 |
-
Click Composites
Parameters  in the Parameters toolbar.
Go to the Laminates tab to add laminates.

-
Click Add Laminate.
-
A default Name and Color are
proposed.
You can edit this name, and select another color from the list.
The number of colors is limited to 56.
You may define more than 56 laminates, but some will share the same
colors.
-
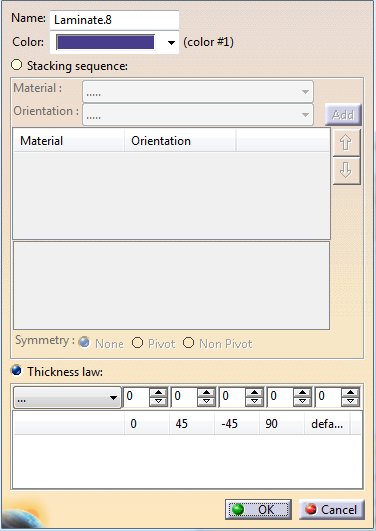
Choose how you want to define the Laminate:
Select either Stacking sequence or Thickness law.
-
If you have selected Stacking sequence:
- Select a material
from the Material
list.
- Select a direction
from the
Orientation list.
- Click Add.
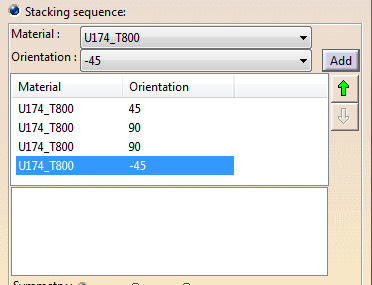
- Repeat as necessary.
- Define a type of
Symmetry to
define only half of the
stacking, if applicable
(None,
Pivot,
Non Pivot).
If you select Pivot, the
last layer in the
list is not used to
compute the symmetric
layers.
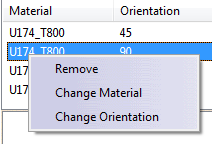
- Select a
material/orientation
couple in
the list, and use the
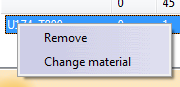
arrows to re-order it.
- Right-click a
material/orientation
couple in the list to access its
contextual menu.
|
-
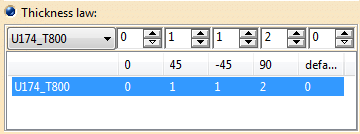
If you have selected Thickness law:
- Select a material to
add a new line in the
thickness law,
- For each direction,
use the spinner to
define the number of
layers in that
direction.
- Right-click a
material to access its
contextual menu.
|
-
Click OK to validate and revert to the
Composites Parameters dialog box.

or

-
In the Laminates tab, select a laminate
- Use the Up and Down arrows to change the order of the
laminates,
- Click Edit Laminate
to edit
it.
When editing a
laminate marked SS-MSS,
i.e. defined from a
master stacking
sequence, you can only
edit the color or switch
to sandard stacking
sequence mode.
In
this case, a warning is
displayed and the layer
data are lost.
- Click Remove Laminate
to remove
it.
|
-
Select the Prevent creation of laminates out of
Composites parameters to forbid the automatic creation of
laminates by other commands.
For example, this ensures that only
laminates validated by the company are used.
-
You can also define the laminates outside of V5:
- In Export to
file, click ... to
select the storage
location and the name of
the file to which the
current data will be
exported.
- Click Export
to launch the export.
If a master stacking
sequence exists, a
message warns you that
it will be exported as a
standard stacking
sequence.
You are
invited to export from
the Master Stacking
Sequence tab
instead.
- Edit the file.
- In Import to
file, click ... to
select the storage
location and the name of
the file to re-import.
- Click Import
to start the import.
The
laminate name of a TL/SS
laminate must be
different from that of
an existing master
stacking sequence
laminate.
Master
stacking sequences in
the file are ignored. A
warning invites you to
import from the
Master Stacking Sequence
tab instead.
The laminate definition is updated
with the information retrieved from the
external file.
Both Excel and texts files are
supported.
laminates.txt and
laminates.xls are provided in the
samples directory as examples.
Although we do not recommend it, it
is possible to import the laminates from
a grid definition file exported as
explained in
Exporting/Importing Grid Data, as
this file contains both information on
the grid and on the laminates. However,
note that the information on the grid
will not be taken into account. In particular, if you
re-export the laminates obtained this
way from the Composites Parameters
dialog box, the information on the grid
will be lost in the export file.
The
Import Laminate command is
also different, as it imports laminates
information specific to defined zones,
given as thickness laws, without color
data, while
Composites Parameters imports
full laminates information, with
stacking defined
either as thickness laws or stacking
sequences.
|
|