Pixel images
- Cast shadows cannot be captured.
- If the visualization mode has been switched to Hidden Line Removal (using Tools > Options > Customize > All Commands) to improve performance, pixel images are captured by replacing Hidden Line Removal by Dynamic hidden line removal (available in the View Mode Customization dialog box). In this case, the two rendering styles give very similar results, the only difference is that Dynamic hidden line removal is a lot faster. To avoid this replacement and generate a pixel image with the Hidden Line Removal rendering style, use the CATPrintRasterNoForcedHRD=1 variable.
Vector images
- In Shading rendering mode, in which edges are not displayed, capturing vector images is not useful, and produces images that cannot be viewed in the album: you capture only lines and edges in vector mode, not shaded surfaces.
- Except for the HRD rendering mode, vector images are captured in Shading with Triangles rendering mode.
- In HRD (Dynamic Hidden Line Removal) rendering mode, vector images are captured in real HLR mode and thus, may look rather different from what you see on screen.
-
Select Tools > Image > Capture to display the Capture toolbar:

The command activated by default in the Capture toolbar depends on the command last used for capturing: - If Pixel Mode was activated last, then it is activated by default when displaying the Capture toolbar
- If Vector Mode was activated last, then it is activated by default when displaying the Capture toolbar.

In non-standard scale mode (i.e. when Small Scale is selected in Tools > Options > General > Parameters and Measures > Scale), you can only capture images in Pixel Mode. Therefore, the Vector Mode icon (in the Capture toolbar) and the Vector tab (in the Capture Options dialog box detailed below) are grayed out. -
Click Pixel Mode
 or Vector Mode
 to choose between a pixel or a vector image.
 -
Click Options
 to access the Capture Options dialog box.
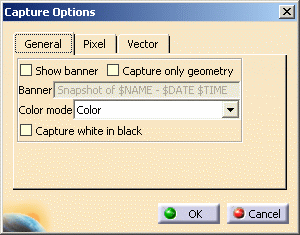
-
In the General tab, set the following options:
- Select the Show banner check box if you want to show a banner on the capture. This activates the Banner box containing the $NAME, $DATE and $TIME variables which, by default, print your username, and the current date and time in the banner at the bottom of the capture. This box is editable: you can delete the variables if required and replace them with a text of your choice.
- Select the Capture only geometry check box if you want to capture the geometry without the specification tree. Note that this option cannot be used for Screen Mode.
- Choose the Color mode from the list: either Color, Greyscale or Monochrome.
- Select the Capture white in black check box if you want white pixels to be in black color on the resulting capture.
-
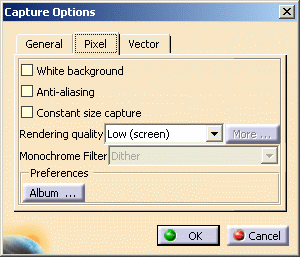
Access the Pixel tab if you are capturing pixel images, otherwise jump to step 7:
-
Click Album... to define your preferences for storing the images you are going to capture in the album:
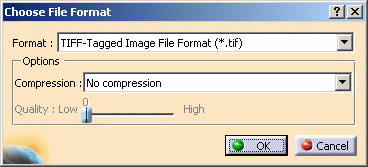
First, select the desired file format from the Format list. Then, select the compression type: - No compression (if you do not want to compress the file). This is the default option
- Packbits
- JPEG
- HUFFMAN
- Fax Group 4.
When you select the JPEG compression type, the Quality slider is activated to let you define more precisely the compression quality (from 0 to 100 %). The higher the value, the better the quality.
-
The Vector tab lets you set the following options:
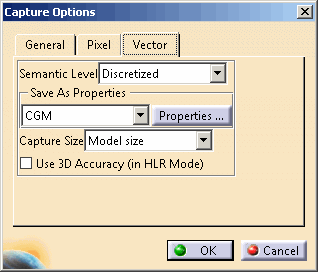
- select the Semantic Level type which enables you
to choose the rendering mode:
- Discretized (i.e. when the image suffers from a lack of points, points are distributed to fill the gaps and ensure linearity)
- Low
- Polyline
- Polyline and Conic
- Polyline and Spline.
- select the format from the list: either CGM or
Generic PostScript,
then set the properties for the chosen format, if necessary:
- If you select CGM, clicking Properties...
opens the Advanced Configuration dialog box:
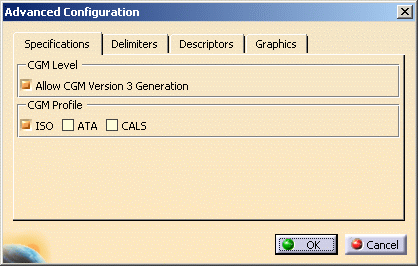
This dialog box contains four tabs which let you define the various parameters associated to the CGM format. - If you select Generic PostScript, clicking
Properties... opens the following dialog box:
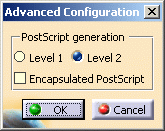
You can choose the desired level for PostScript generation and activate the Encapsulated PostScript (EPS) format as well. EPS does not contain page description directives and is designed for portable exchange between applications and platforms. It may also be included in a larger PostScript document.
Note: captured images saved in the album are always saved in CGM format. The properties you define in the Capture Options dialog box have no impact on the format of the image stored in the album. These properties will be applied to the format you select when using the Save As button in the Capture Preview window (as explained below).
Therefore, to save an image in Generic PostScript format, select Generic PostScript in the Capture Options dialog box and define the level to be used then, when the image is captured, click the Save As button to select the image format. - If you select CGM, clicking Properties...
opens the Advanced Configuration dialog box:
- When capturing a document in Vector mode, the
size in mm of the generated 2D document depends on the size you
select in the Capture Size list:
- Model size means that the size of the image corresponds to the size of the model. For instance, if the captured model is a 10 mm coin of 1 Euro, then the size of the captured image will be 10 mm.
- Display size means that the size of the image corresponds to the size of the model as displayed on screen. For instance, if the captured model is a coin of 1 Euro and it is zoomed to a size of 200 mm on screen, then the size of the captured image will be 200 mm.
- select the Semantic Level type which enables you
to choose the rendering mode:
-
Once you are satisfied with the parameters, click OK to validate.
-
Click Capture
 to capture the image and store it in the album. A progress bar appears
while the captured image is generated.
 When the captured image is generated, the Capture Preview window opens: 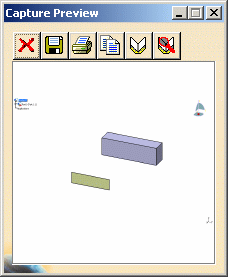
The Capture Preview window provides a preview of the captured image that will be stored in the album when you click Album  .
.This window also enables you to use the following icons to:
-
 cancel the image (and close the Capture Preview
window).
 -
 save the image under another name and/or another format. To do
so, click the Save As button, give a name to the image
then navigate to the desired location before clicking OK
to confim the save. Refer to Saving
Images to Other Formats for detailed information.
 -
 print the image. Clicking this button opens the Print
dialog box. Refer to Customizing Print
Settings for detailed
information.
 -
 copy the image to the clipboard.
 -
 open the album.
-
-
Click Album
 to store the image in the album.
Note that images captured in Vector Mode are saved on a 1:1 scale and not in A4 format anymore. -
Click Open Album
 or select Tools > Image > Album to display the album.
The album is displayed, listing the current contents of the album. 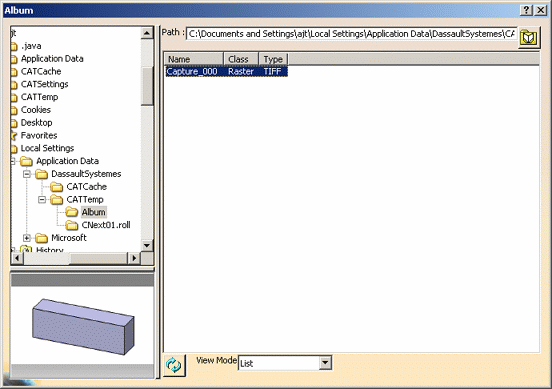
For detailed information on how to display and edit images in the album, refer to Previewing Images in the Album and Editing Images in the Album.
![]()
The contents of the album are stored on your system in a non-editable file in the location defined by the CATTemp environment variable. Deleting this file deletes the contents of the album.
![]()
