This task shows you how to create angular dimension annotations.
- When the dimension supports are related to a parameter (sketch's constraints, knowledge, etc) for which tolerances are still defined, they are set to the dimension tolerances.
To improve the highlight of the related geometry, see Highlighting of the Related Geometry for 3D Annotation.
-
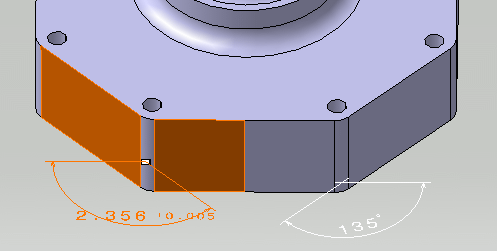
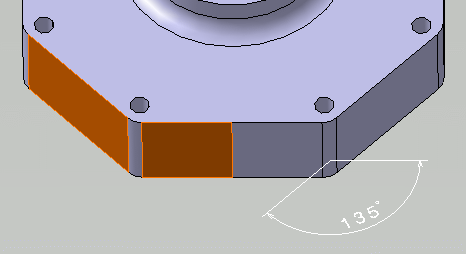
Select the surfaces as shown on the part.
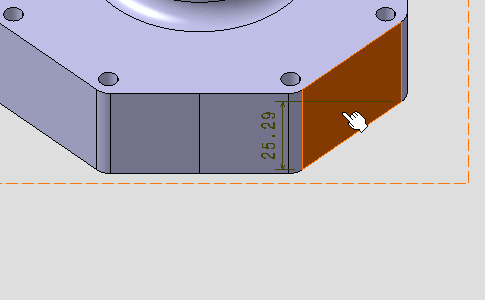
A linear dimension appears during the creation process before you select the second surface. 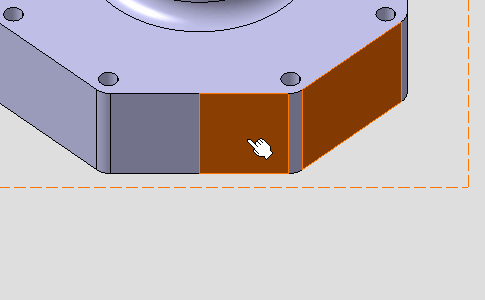
The angular dimension appears.
If the angular dimension does not appear, right-click the dimension and from the contextual menu select Angle.
-
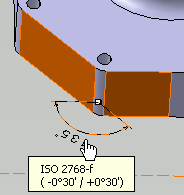
Right-click the angular dimension and select Angle Sector > Sector 4
 from the contextual menu.
 The angular dimension is modified. 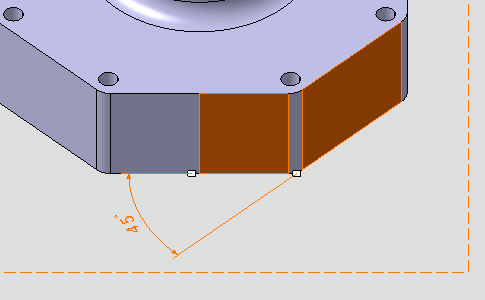
-
Click outside any geometry to end the dimension creation process.
-
Right-click the angular dimension and select Dimension.1 object > Angle Sector > Sector 1
 from the contextual menu.
The angular dimension sector is modified. 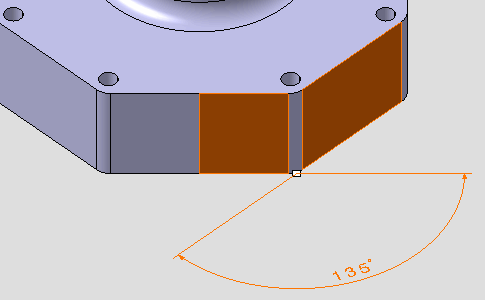
If the
Always try to create semantic tolerances and dimensions option and the
Always try to create semantic general tolerances on dimensions
option have been
selected, the dimension is set as semantic. The Toleranced Angular Size
![]() icon is displayed in the specification
tree and the angular dimension named Angular Size.1 during the
dimension creation process.
icon is displayed in the specification
tree and the angular dimension named Angular Size.1 during the
dimension creation process.
-
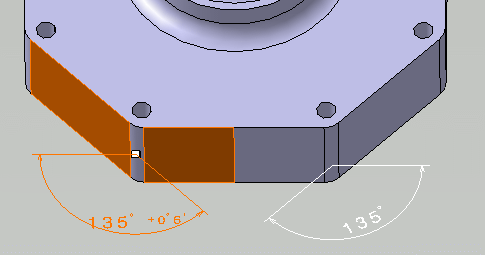
Select the two surfaces as shown,
to create semantic angular dimension.
- Click
Tolerancing Advisor
 in
Annotations toolbar.
in
Annotations toolbar.
The Semantic Tolerancing Advisor dialog box appears.
The buttons and options available in the dialog box depend on your selection.

The Propagation Selection options are displayed according to the type of face selected depending on the canonicity. In this scenario the options are not used. For more information, refer to Propagating Geometry Selection for Feature Creation.
- Click
Angle Creation
 . The Limit of Size
Definition
dialog box appears.
. The Limit of Size
Definition
dialog box appears.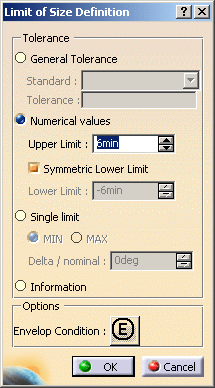
The angular dimension is previewed and the Limit of Size Definition dialog box appears, offering the following options: - General Tolerance: Lets you define a pre-defined
class of tolerance; see
Tolerances for the default class setting.
- Numerical values: Lets you define the Upper Limit and optionally the Lower Limit (provided you clear the Symmetric Lower Limit option).
- Single limit: Lets you enter a minimum or maximum tolerance value. Use the Delta / nominal field to enter a value in relation to the nominal value.
- Information: Lets you to set the dimension as information (ISO-based standards)/ reference (ASME-based standards). The information/reference dimension is displayed enclosed by parentheses in geometry window.
- General Tolerance: Lets you define a pre-defined
class of tolerance; see
Tolerances for the default class setting.
- Click OK. The angle is created.
- Click
Close
in the Semantic Tolerancing Advisor
dialog box.
- The numerical
description of the angle can be changed using the
Numerical Properties
toolbar.
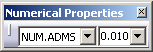
In this case change the Numerical Display Description to NUM.ARAD and Precision to 0.00100. The dimension is updated. 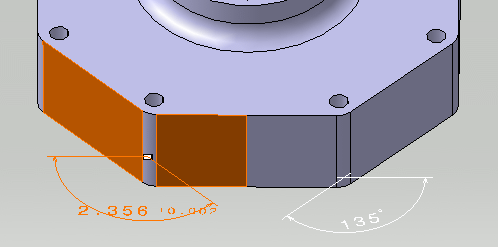
- To edit the
semantic angular dimension, right-click it and select
Angular Size.1 object > Definition....
The Limit of Size Definition dialog box appears.
You will see that in the Numerical values, Upper Limit and Lower Limit, the unit has been changed from min to rad even if the knowledge unit is still Degree, Minute, Second (Tools > Options > General > Parameters and Measures, Units tab).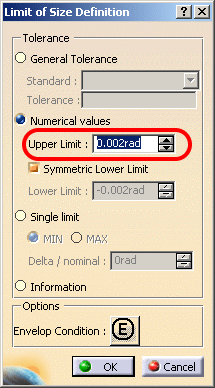
From R18 onwards, the contextual menus Add Multiple Values and Add Range are not supported, in the Limit of Size Definition dialog box, Numerical values, Upper Limit and Lower Limit fields. - Change the Upper Limit to 0.005rad.
- Click
OK.
The dimension is updated.