|
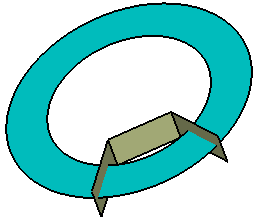
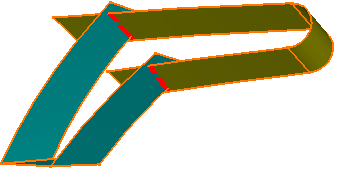
This task shows how to split a surface or wireframe element
by means of a cutting element.
You can split a wireframe element by a point, another wireframe element or
a surface; or a surface by a wireframe element or another surface. |
| |
|

|
Open the
Split1.CATPart document. |
 |
-
Click Split
 . .
The Split Definition dialog box appears as well as the
Tools Palette.
For further information about the Tools Palette, refer to Selecting
Using Selection Traps in the CATIA Infrastructure User's Guide. |
-
Select the element to be split.
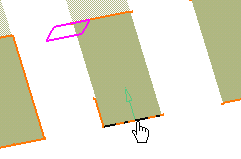
| You should make your selection by clicking on the
portion that you want to keep after the split. |
 |
 |
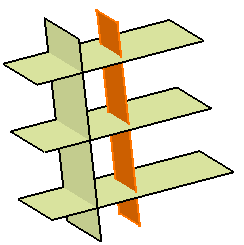
You can select several elements to cut. In
that case, click Element to cut again or click
 .
The Elements to cut dialog box opens. Select as many elements as
needed. Click Close
to return to the Split Definition dialog box. The number
of selected elements is displayed in the Element to cut
field. .
The Elements to cut dialog box opens. Select as many elements as
needed. Click Close
to return to the Split Definition dialog box. The number
of selected elements is displayed in the Element to cut
field. |
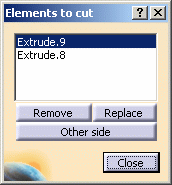 |
Click Remove or
Replace to modify the elements list.
When several elements to cut are selected,
the selected portions are not taken into account as parts to keep.
The parts to be kept depend on the type of the cutting element
(point, curve, surface, etc.) and the orientation of cutting
elements and the elements to cut.
Click Other side to reverse the portion to be kept,
element by element. |
-
Select the cutting element.
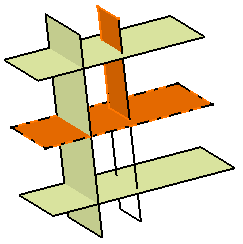
| A preview of the split appears. You can change the
portion to be kept by selecting that portion. |
You can also select the portion to be kept by
clicking the Other side button.
This option applies on all selected elements to cut. |
 |
 |
You can select several
cutting elements. In that case, note that the selection order is
important as the area to be split is defined according to the side
to be kept in relation to the current splitting element. |
You can create a Join as the splitting element, by right-clicking
Cutting elements and choosing Create Join.
If you split a surface and you keep both
sides by joining the resulting splits, you cannot access the
internal sub-elements of the join: indeed, splits result from the
same surface and the cutting elements are common. |
-
Click OK to split the element.
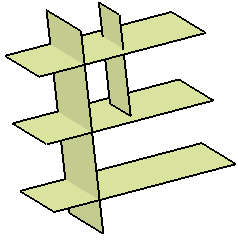
| The created element (identified as Split.xxx) is
added to the specification tree. |
| In the case several elements to cut were used, the
created elements are aggregated under a Multi-Output.xxx feature. |
 |
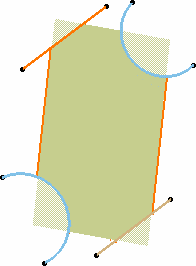
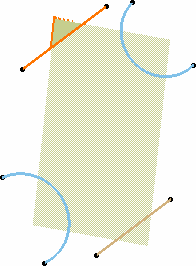
| In the illustrations below, the top-left line is the
first splitting element. In the left illustration it defines an area
that intersects with the other three splitting curves, and in the
illustration to the right, these three elements are useless to split
the area defined by the first splitting element. |
 |
 |
| Would you need to remove or replace one of these
cutting elements, select it from the list and click Remove
or Replace . |
|
| |
Keeping or Removing Elements
|
|
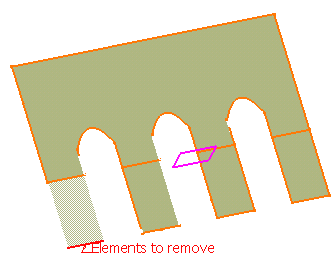
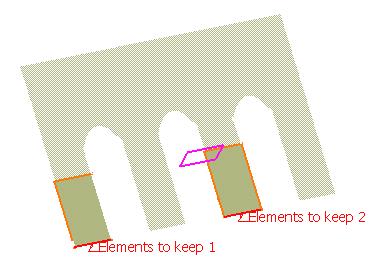
Elements to remove and
Elements to keep allows to define the portions to be removed or kept
when performing the split operation.
- Click Show parameters >>.
- Click in the field of your choice to be able to select the elements
in the 3D geometry.
- Right-click in the field either to clear the selection or display the
list of selected elements.
 |
|
Only the selected element is removed.
All other elements are kept |
|
| |
 |
|
The selected elements are kept.
All other elements are removed |
| |
|
- You must select sub-elements as elements to keep or to remove;
otherwise, a warning message is issued.
- You can also select a point to define
the portion to keep or to remove.
| A contextual menu is available on the Elements to
remove and Elements to keep fields. |
- You do not need to select elements to keep if you already
selected elements to remove and vice-versa.
- Select Keep both sides to retain the other side of
the split element after the operation. In that case it appears
as aggregated under the first element.
| Therefore both split elements can only be edited together
and the aggregated element alone cannot be deleted. |
| If you use the Datum mode, the
second split element is not aggregated under the first one,
but two datum surfaces are created. |
- Avoid splitting geometry when the
intersection between the element to cut and the cutting element
is merged with an edge of the element to cut. We advise you to
use the Elements to remove and
Elements to keep options to remove the positioning
ambiguity.
- In case there are several elements to cut, Keep/Remove
and Keep both sides only
apply on the first selected element.
- In case the intersection between the
elements is not connex, an error message may be issued prompting
you to choose the elements to be kept or not.
-
Select
the
Ignore no intersecting elements check box to split many
elements (curves, surfaces, volumes) when the cutting element
does not intersect all the elements.
 |
When this option
is selected, the
Intersections computation option is cleared
and grayed out. |
-
Select the
Keep elements in half space check box to keep all the
elements that are on one side of the cutting infinite plane. The
cutting element defines this half space.
 |
- This
option applies only when the cutting element is an
infinite plane.
- If the split side is not towards the element to
cut, an error message is issued. Note that, this
behavior differs from the behavior in the Part
Design workbench, i.e. no error message is issued.
- If the cutting element is not an
infinite plane, an error message is displayed.
- If the element to be cut is a volume and the
cutting element is not an infinite plane, the option
does not work and no error message is displayed.
|
 |
When this option is selected, the
Ignore no intersecting elements option is
automatically selected and grayed out. |
|
 |
|
|
|
Elements to cut:
dark blue and light blue surfaces
Cutting elements: yellow and purple planes |
 |
|
Result with
Ignore no intersecting elements selected |
|
 |
|
|
|
|
|
Element to cut:
non connex light blue surface
Cutting element: yellow plane |
|
 |
|
|
Result with
Keep elements in half space selected |
|
|
| |
Intersecting and extrapolating
|
|
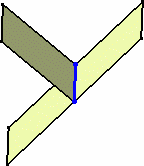
- Select Intersections computation to create an aggregated
intersection when performing the splitting operation. This element will
be added to the specification tree as Intersect.xxx.
 |
 |
In case there are several elements to cut, the Intersections
computation option only applies on the first selected element. |
|
| |
- From the Extrapolation type list, select one of the
available extrapolation types:
- None: The cutting element has to completely intersect the
element to be cut.
- Tangent: The cutting element is extrapolated along the
tangents, to cut the element to be cut.
- Curvature: The cutting element is extrapolated along the
curvature, on the element to be cut
|
- The Tangent and Curvature options activate the
automatic extrapolation while the None option de-activates
the automatic extrapolation.
If the Tangent and Curvature options are selected for
a split operation, the automatic extrapolation is activated for the next
trim operation. If the automatic extrapolation is activated for a trim
operation, the Tangent extrapolation type is automatically
selected for the next split operation.
- Select a either Volume or Surface as the
result type.
 |
When you select a volume or a solid as an element to be cut
and surface is selected as the result type, the extrapolation
options might not create the expected result. |
|
| |
|
| |
Splitting Wires
|
|
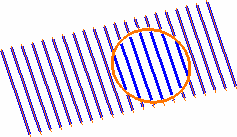
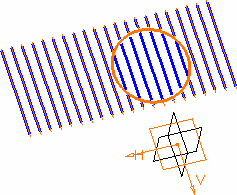
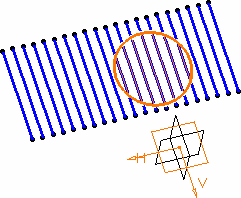
- When splitting a wire (curve, line, sketch and so forth) by another
wire, you can select a support to define the area that will be kept
after splitting the element. It is defined by the vectorial product of
the normal to the support and the tangent to the splitting element.
| This is especially recommended when splitting a
closed wire. |
| The non disconnected elements of the element to cut
are kept in the result of the split. |
 |
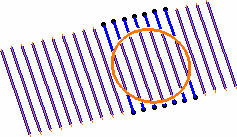 |
| Splitting with no support selected, first solution |
Splitting with no support selected, second solution |
| |
|
 |
 |
| Splitting with a selected support (xy plane), first solution |
Splitting with a selected support (xy plane), second solution |
|
|
Splitting a surface by a curve or a surface by a
surface
|
 |
The following steps explain how split a surface
by a curve or another surface. |
| |
Split surface/curve
|
|
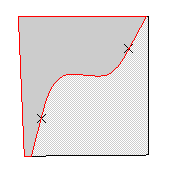
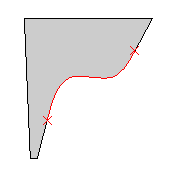
- First, the cutting element (the curve) is laid down the surface.
- Then, the result of step 1 is tangentially extrapolated in order to
split the surface correctly (as shown in following figure). However, when
this extrapolation leads to the intersection of
the cutting element with itself prior to fully splitting the initial
element, an error message is issued as there is an ambiguity about the
area to be split.
| |
 |
 |
 |
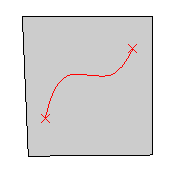
If the cutting element
does not reach the free edges of the element to cut, an extrapolation
in tangency is performed using the part of the cutting element that
lays down the surface. |
|
| |
Split surface/surface
|
 |
Open the
Split2.CATPart document. |
|
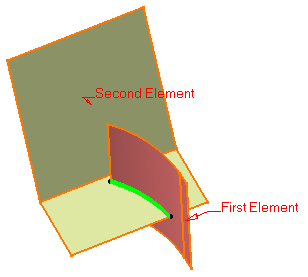
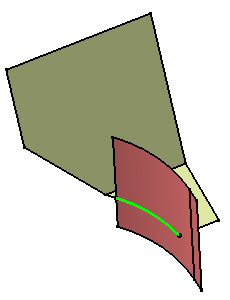
- First, an intersection (the green wire) is
created between the two surface elements.
- Then, the result of the intersection is automatically extrapolated in
tangency up to the closest free edges of the element to cut.
| The result of the extrapolation is used as the
cutting element and the split is created. |
 |
 |
Note that it is not the
cutting element which is extrapolated but the result of the
intersection. |
 |
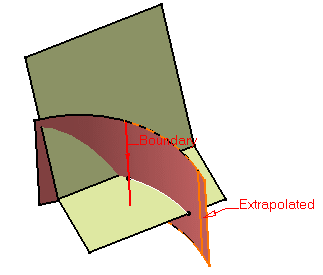
If the result of the split is not
what was expected, it is also possible to manually extrapolate the
cutting element with the
extrapolate feature before creating the split. |
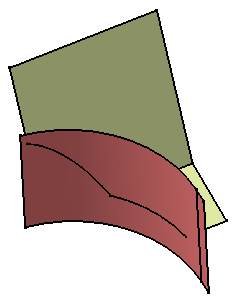
- Extrapolate the cutting element (the red surface) in order to fully
intersect the element to cut.
- Then, use the extrapolated surface as the cutting element to split
the surface.
 |
 |
- Avoid using input elements which are
tangent to each other since this may result in geometric
instabilities in the tangency zone.
|
|
| |
Splitting Closed Surfaces by Two Connex
Surfaces or Curves
|
| |
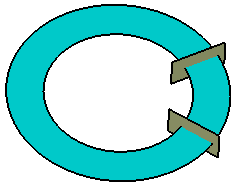
When splitting a closed surface or a curve by connex
elements, an error message is issued. You need to create a join feature
of non connex elements and cut the closed surface or curve with this join
feature. |
 |
Open the
Split3.CATPart document. |
| |
|
 |
- Click Join
 . .
| The Join Definition dialog box appears. |
- Select Split.1 and Inverse.1 as the surfaces to be joined.
 |
Be careful that both surfaces
or curves to join have coherent orientations.
If it is not the case, use the Invert
Orientation
command to invert the orientation of one of the two surfaces or
curves.
Note that coherent orientations mean same orientations as the faces
or edges of an equivalent connex splitting surface or curve:
|
-
Clear Check connexity
.
- Click OK to create the joined surface.
- Click Split
 . .
|
The Split Definition
dialog box is displayed. |
-
Select Surface.1 as the
Element to cut and Join.1 as the Cutting element.
-
Click OK to split
the closed surface.
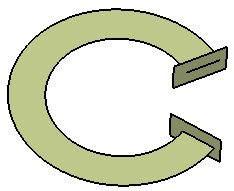 |
 |
If the orientation of the elements composing
the joined surface or curve is incoherent, an error message is issued
when creating the split surface. |
|
| |
Splitting A Surface When The Intersection Is
Not Connex
|
| |
In case the intersection between the
elements is not connex, an error message may be issued informing you
to choose the elements to be kept or not.
In this case, use the Elements to remove and
Elements to keep options. |
| |
Splitting Volumes
|
 |
This capability is only available with Generative Shape Optimizer. |
| |
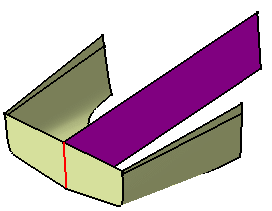
Providing the element to be cut is a volume and the
cutting element is a volume or a surface, you can choose whether you want
the result of the split to be a surface or a volume. To do so, switch to
either Surface or Volume option. This switch only
concerns volumes since the transformation of a surface can only be a
surface.
Note:
- Replacing an input element does not change the result type,
- The switch between surface and volume is grayed out when editing the
feature.
If the result of the split is a volume, the split is a modification
feature. If the result of the split is a surface, the split is a creation
feature.
To have further information about volumes, please refer to the Creating
Volumes chapter.
|
| |
|
| |
 |
- You can also split a solid using a plane, a volume, or a
surface as a cutting element. The result of the split is a
volume or a surface. You can choose whether you want the
result of the split to be a surface or a volume. To do so,
switch to either Surface or Volume
option.
- The following capabilities are
available: Stacking Commands
and Selecting
Using Multi-Output.
|
|
 |
Approximating the Split Result
|
| |
You can control the quality of the result of the
split
through several parameters and modes. |
 |
- Double-click the split result in the specification tree to edit it.
| The Split Definition dialog box appears. |
- Select the Approximation tab.
-
In the Approximation mode
list, select any one of the options:
- None: the resulting split surface is not
approximated.
By default, this option is selected.
- Deviation: the resulting split surface is
deviated according to the given length.
Note:
- The Deviation field is available when you
select this option.
- The deviation between the resulting
surface and the original Split result is not more
than the given value.
|
- Parameters: the resulting surface is computed
according to the given parameter limits.
| You can control the following parameters: |
- Max Order: On each scale (U,
V), the polynomial approximation order is lower than
the input value.
- Max Segment: On each scale (U, V),
the surface is divided into segments that define
areas that are approximated.
The number of segments is lower than the input
value.
|
|
-
Click OK.
| The split result is approximated. |
 |
The approximation is only available for
rectangle type surfaces, i.e. for the surfaces which have only
four side
edges. |
|
|
|
|
|
|
|
|

|
 .
.


