Read About Forming Simulations and About the Forming Process for more information.
-
Click Detailed Forming Simulation
 .
.
-
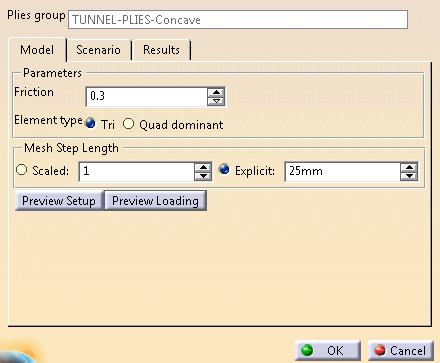
Select TUNNEL-PLIES-Concave as the Plies group.
Set the Element type to Tri.
Under Mesh Step Length, select Explicit and enter 25mm.
-
Click OK to validate the creation of the Detailed Forming Simulation.
-
Double-click Forming simulation.1.
-
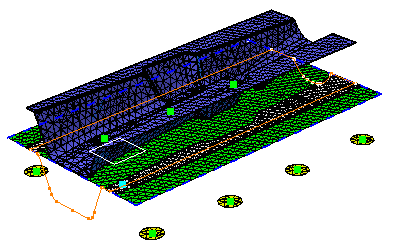
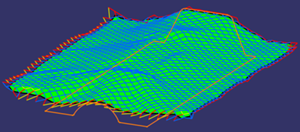
Click Preview Setup to visualize the finite elements meshes of the blanks, grippers, punches.
-
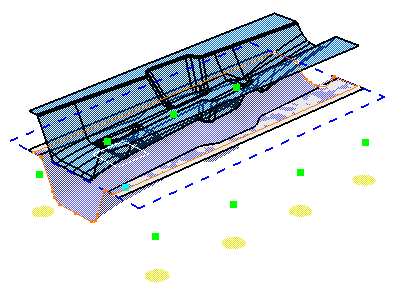
Click Preview Loading to visualize the animation of the forming steps.
-
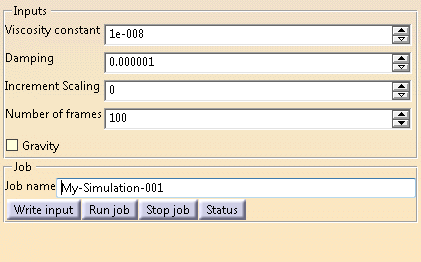
Go to the Scenario tab.
Clear the Gravity check box.
If required, edit the job name.
-
Click Run job, enter the required path.
-
Click Status to follow the progress.
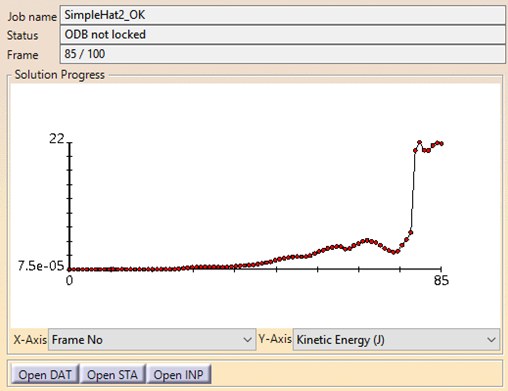
It shows a graph retrieved from the .sta Abaqus output file.
The plot is automatically refreshed when a new frame is calculated.
You can easily see if too much energy is built up, which indicates an error in setting the model.
Supported plotting:
In X-Axis: Frame No, Total time (s), CPU Time (min).
In Y-Axis: Kinetic Energy (J), Total Energy (J), Change Mass (%). -
While the computation is running, go to the Results tab.
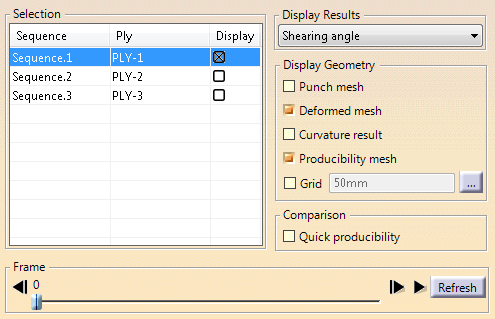
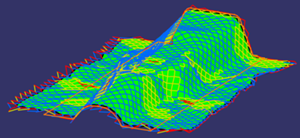
Select PLY-1 in the Display column.
Multiple selection by Shift key is available.
Select Shearing angle in the Display Results list.
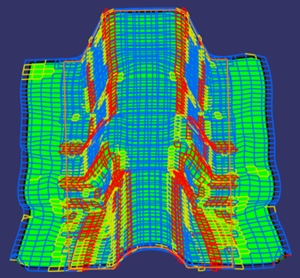
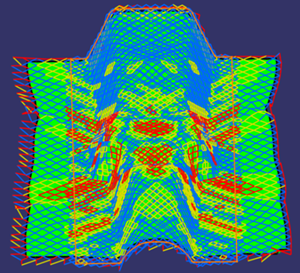
Select Punch mesh, Deformed mesh and Producibility mesh under Display Geometry.
If necessary, select the Grid check box, and ... to enter Adjustments values.
The grid facilitates comparison with experimental results where a grid is painted on the material to be formed. It appears as a set of lines, passing through the Reference Point by default (You can move it in the warp and weft directions). -
Click Refresh to retrieve the current results of the simulation.
-
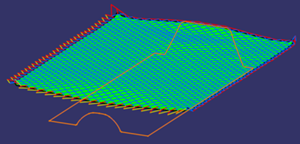
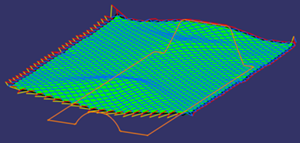
Review the shearing and deviation of all present plies.
-
Click Quick producibility to compare the quick and detailed simulation results.
![]()