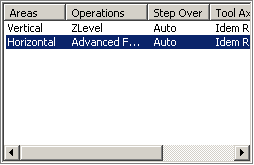
Advanced Finishing is dedicated to machining grooves in one shot: the vertical area will be machined with ZLevel passes while the horizontal area will be machined with contour-driven passes.
The input can be either a complete part or a rework area feature.
To create the operation you define:
- the
geometry of the part to machine
 ,
,
- the
tool
to use
 .
Only end mill
.
Only end mill
 tools
are available for
this operation,
tools
are available for
this operation,
- the parameters of the
machining
strategy
 ,
, - the feedrates and spindle speeds
 ,
, - the macros
 .
.
Only the geometry is obligatory, all of the other requirements have a default value.
- make the Manufacturing Program current in the specification tree if you want to define an operation and the part/area to machine at the same time,
- or select a machining feature from the list if you have already defined the area to machine and now you want to define the operation to apply to it.
Machining a Complete Part
-
Click Advanced Finishing
 .
.
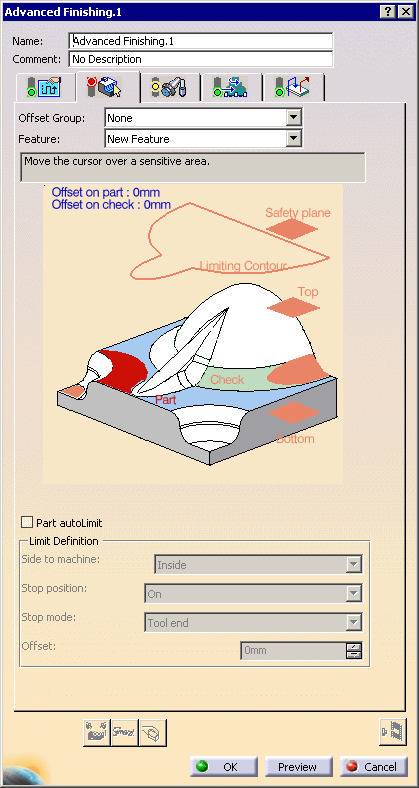
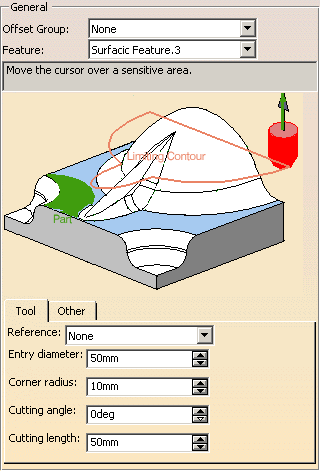
The Advanced Finishing dialog box is displayed.
An Advanced ZLevel entity and a default tool area added to the program.
The dialog box opens at the geometry tab page .
.
This page includes a sensitive icon to help you specify the geometry to be machined.
The area that represents the part geometry is colored red indicating that the geometry is required. All the other geometry parameters are optional.
-
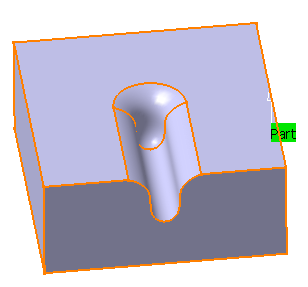
Click the red area in the sensitive icon and select the part in the viewer.
Then double-click anywhere in the viewer to confirm your selection and redisplay the dialog box.
-
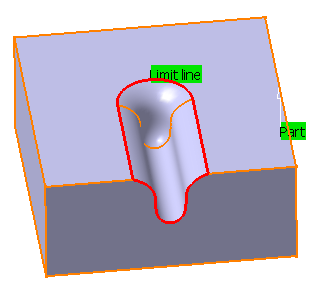
Click Limiting Contour and select a limiting contour as follows:
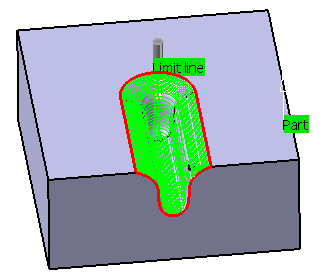
-
Click Tool Path Replay
 .
.
A progress indicator is displayed.
You can cancel the tool path computation at any moment before 100% completion.
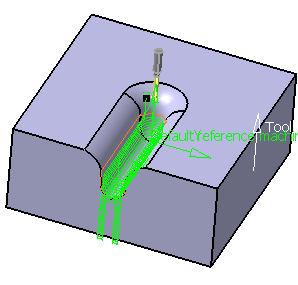
The tool path is computed.
Machining a Rework Area
-
Click Rework Area
 .
.
Name this rework area Rework Area feature.1.
Select the part and set the parameters as follows.
Click Compute:
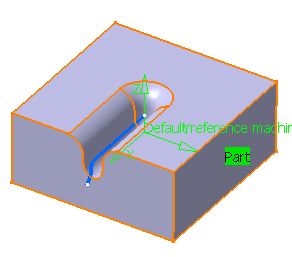
You can see an horizontal zone in blue, with a vertical zone in it.
Still in the Rework Area dialog box, go to the Operations tab and assign an Advanced Finishing operation to the horizontal zone.
-
Click Advanced Finishing
.
The
Advanced
Finishing dialog box is displayed.
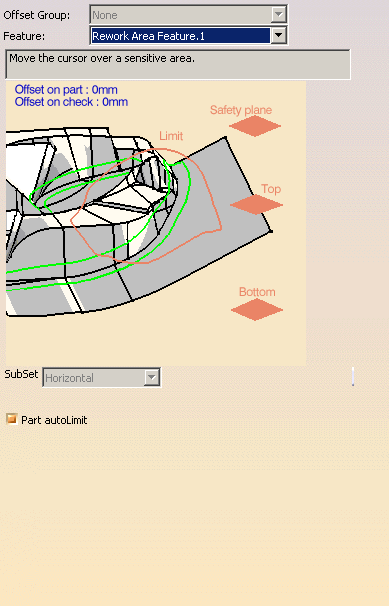
In the Geometry tab, select the rework area you have created as the Feature. The dialog box changes to:
-
In the Machining Strategy tab, set the Machining parameters as follows:
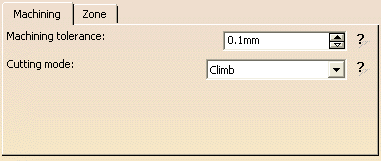
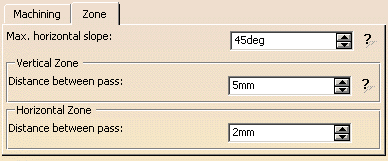
and the Zone parameters as follows:
-
Click Tool Path Replay
.
The tool path is computed.
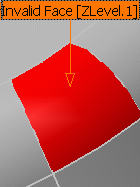
Invalid Face
-
If a tool path cannot be computed because of invalid faces,
an explicit warning message like this one will appear:
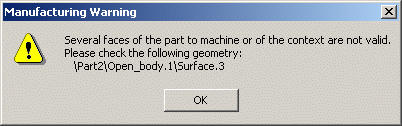
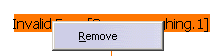
Each invalid face is highlighted in red, with an arrow pointing on it.
This visualization is removed when you close the main dialog box or
when you select Remove in the contextual menu.
-
Click OK in the Warning box to revert to the main dialog box.
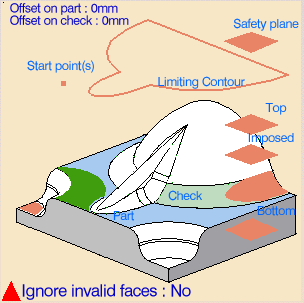
In the Geometry tab, a message Ignore invalid faces: No is displayed:
-
You can either:
- close the dialog box.
When you reopen it, the Ignore invalid faces: No will not be displayed. - heal the defective geometry and restart the computation.
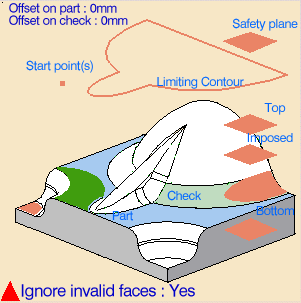
If it is successful the message Ignore invalid faces: No will disappear. - ignore the invalid faces. Click the text Ignore invalid
faces: No.
It will turn to Ignore invalid faces: Yes and the computation will continue.
The message remains displayed as a warning.
- close the dialog box.
We recommend that you ignore only faces that will not affect the tool path. Otherwise this may lead to defective tool paths.
![]()