This task shows you how to apply a shadow sticker.
-
Click Apply Shadow Sticker
 in the Apply Material toolbar. The
Shadow dialog box is displayed:
in the Apply Material toolbar. The
Shadow dialog box is displayed: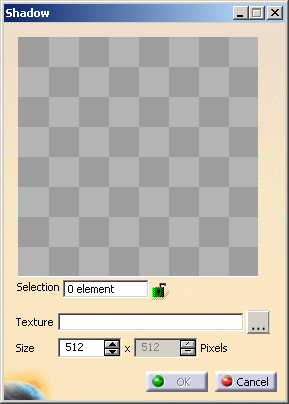
-
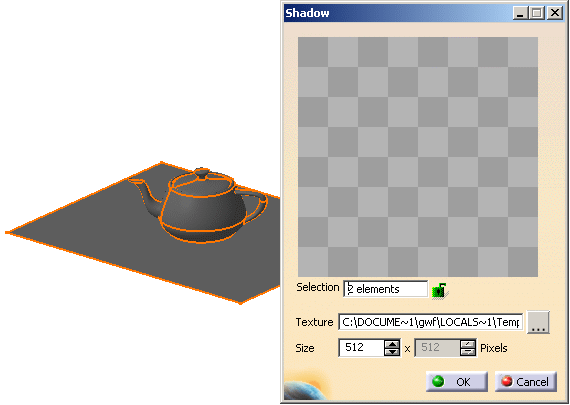
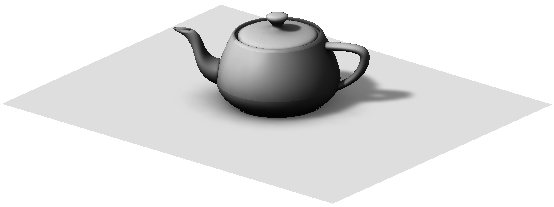
Select Teapot (Teapot.1) and Plane (Plane.1) in the specification tree. The teapot and plane to which the shadow has to be applied is selected in the geometry. The Selection field is updated. The geometry is as shown:
-
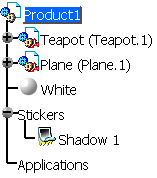
Click OK in the Shadow dialog box. The specification tree shows the created shadow.
- You can create as many shadows as you want.
- When a shadow sticker is created, it contains an empty texture. To see the actual shadow, the shadow sticker needs to be rendered.
- All the shadows created are displayed in the specification tree as Shadow 1, Shadow 2, etc. under the Stickers node.
- If regular stickers are applied to the geometry, the shadow sticker should be below the regular sticker in the specification tree, else the shadow sticker will not be rendered.
Rendering Shadow Stickers
-
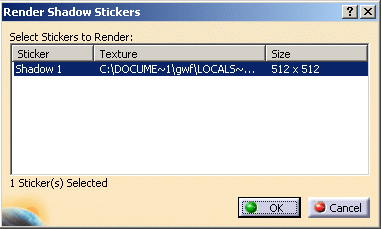
Click Render Shadow Stickers
 in the Apply Material toolbar. The
Render Shadow Stickers dialog box is displayed.
in the Apply Material toolbar. The
Render Shadow Stickers dialog box is displayed.
|
|
|
- Select one of the stickers (in case more than 1 are
displayed in the dialog box) and click OK in the Render
Shadow Stickers dialog box. The Computing...
dialog box is displayed. The shadow sticker is applied to the
geometry.

The rendered object with shadows is displayed.
- Pre-R19, this functionality required the RTR and PH1/PHS licenses. However, this functionality now requires only the RTR or MRR license.
- The shadows created depend on the source of light. For more information regarding creating a light source, refer Light Sources.
- If no light source is created, the default light settings in CATIA are taken into account.