Creating Helical Surfaces

This task shows how to create helical surfaces from wireframe geometry.

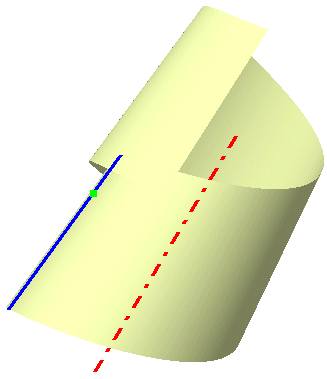
The command Helix creates a helical surface, by gradually displacing the guide along the rotation axis at the same time as it rotates about this axis. The resulting surface is referred to as a helicoid.

Open the Helix.CATPart document.

  1. Click the Helix icon .
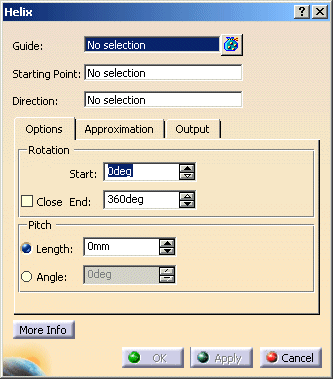
    The Helix dialog box appears.


The model contains 3 geometry elements.


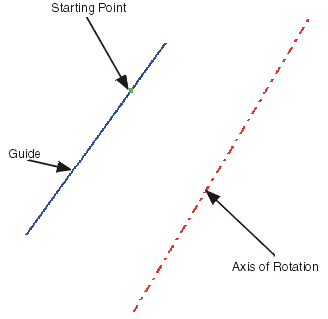
  1. Select the Guide, the Starting Point and the Direction (axis of rotation).

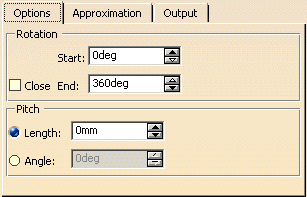
  2. Set start angle to 0° and end angle to 90°.

  3. Set length to 0 mm.

  4. Click Apply.

  A Helix Feature surface is created.


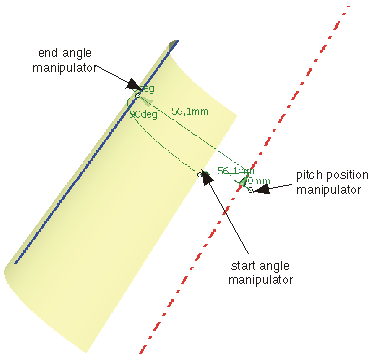
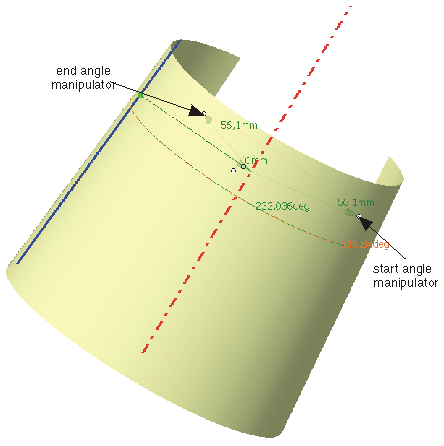
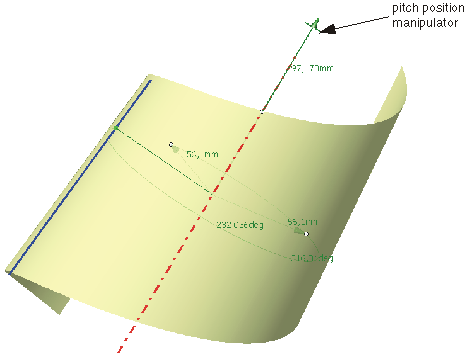
Start and end angle as well as the pitch can be modified dynamically using the manipulators.

  1. Select the manipulators for start and end angle and modify the angles.


  1. Select the manipulator for pitch position and draw it along the axis of rotation.


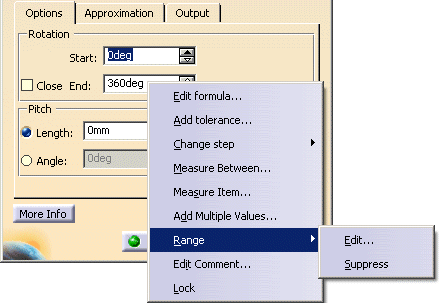
By default, the input range for start and end angle is from 0° to 360°. This range can be modfied:

 
  1. Activate the contextual command by clicking the right mouse button on the text field End and the option Range > Edit....


  1. Set in the dialog box 'Range' the Sup. Range to 720° and close the window with OK.


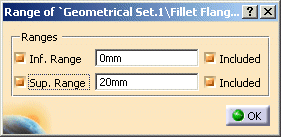
  1. Set in the dialog box 'Helix' the start angle to 0° and the end angle to 450 °.

  2. Click OK to create the helical surface.

You can define the following options:
  • Guide: Selects the guide.
  • Starting point: Selects the origin of the local coordinate system.
  • Direction: Selects the axis of rotation.
  Options tab
 
  • Rotation: Defines the helical surface by start and end angle by which the guide is rotated about the axis of rotation.
    • Start: Defines the angle where the surface starts with reference to the starting point.
    • End: Defines the angle where the surface ends with reference to the starting point.
    • Close: Creates a closed surface with values equivalent with Start = 0° and End = 360°.
      The surface is closed if Pitch - Length = 0 mm and Angle = 0°.
  • Pitch: Defines the height of the helix measured over an angle of 360° (not the height of the created helix). The turn spacing is the distance between the start and end points of the displacement along the axis after one complete revolution (angle of rotation 360°). It can be defined in millimeters (Length) or degrees (Angle).
    • Length: Height of the helix measured over an angle of 360°.
    • Angle: Gradient angle of the helix measured with regard to the normal plane of the axis.

  See Approximation tab
  See Output tab
  Click 'More Info' to display deviations and output results.
 
  • Display: Depending on the options selected, values are displayed in the graphics area.
  • U+V: Display of the UV vectors of curves and surfaces.
  • Dynamic, Static, None: See Apply Modes.
  • Deviation: Maximum deviation between the edges of the created surface and the original curves.
    • Guide: Displays the deviation of the approximated guide.
    • Form: Displays the deviation from the helix surface.
  • Output Result: See Output Result