You can add the following welding symbols according to the dedicated standard.
Complementary symbols
You can add the following contour symbols according to the dedicated standard.
| Name | AWS | ISO | JIS |
| Concave face |
|
|
|
| Convex face |
|
|
|
| Fillet weld with smooth blended face | NA |
|
NA |
| Flat face |
|
|
|
| Flush finished | NA |
|
NA |
Finish symbols
You can add the following finish symbols according to the dedicated
standard.
| Name | AWS | ISO | JIS |
| C |
|
|
|
| F |
|
|
|
| G |
|
|
|
| H |
|
|
|
| M |
|
|
|
| R |
|
|
|
| U |
|
|
|
|
|
Field weld |
|
|
Weld-all-around |
|
|
Weld text side (up or down) |
|
|
Indent line side (up or down) |
|
|
Weld tail |
|
|
Alternative welding staggered display |
|
|
Reference |
-
Click Weld Feature
") from the Annotations toolbar.
from the Annotations toolbar. -
Select an element or click in the free space to position the leader anchor point.
The welding leader and the Welding creation dialog box are displayed.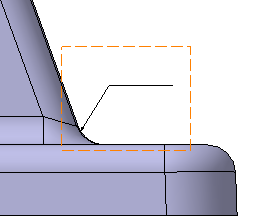
-
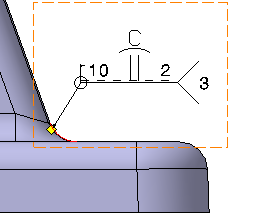
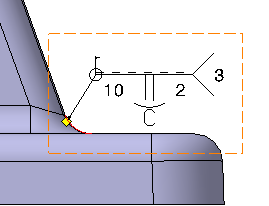
Select the direction for the weld text side and the indent line side.
-
Enter the values in the required boxes.
- When you specify the size of weld and the length of weld, a new box appears above it for additional information.
- The engineering symbols can be inserted in all the boxes except the box below plug symbol.
- When you select welds created in the Weld Design app, the welding specifications (size of the weld, length of the weld, and primary welding symbol) automatically appear which cannot be edited. In the Welding Symbol dialog box, you can specify the other editable symbols.
- When you modify the welds in the Weld Design app, the isolated annotations are not updated.
- When an associative welding symbol is created, it can be connected with another 3D weld (which may be not be of same type and length) using geometry connection management without any warning.
-
In the Welding symbol dialog box, select the direction for the Weld text side
") and the Indent line side
and the Indent line side
") .
.
- In the case of a Drafting view associative to a weld specification originally defined in the Weld Design app, this dialog box is pre-filled in accordance with the 3D specification. The welding symbol is created associatively to the 3D specification. In this case, the parameters in the dialog box cannot be modified.
- The Indent line side
is available only when the
welding symbol display System-A is selected in the
welding parameters of ISO standard. Fore more information, see
Welding.
-
Specify the appropriate primary welding, complementary, and finish symbols. For more information
- The welding symbols are available depending on the selected standard.
- The welding symbol is automatically updated when the drawing standard is switched. For example, from JIS to ISO. During the switch, a symbol is not displayed if it is unavailable in the target standard.
- When an elementary or a supplementary symbol is selected, another pair of these symbols appear above them.
- The Indent line side is available only when the welding symbol System-A is selected in the ISO standard. For more information, see
- When the plug weld symbol is selected, a box appears below it.
- The staggered (Z) symbol is displayed in the welding symbol annotation only if a text is entered next to the staggered symbol.
- In the Welding Symbol
dialog box, the staggered symbol appears based on the welding
staggered display parameter selected in the
Standard Definition dialog
box. For more information, see Welding.
- Usual: To display the staggered (Z) symbol in the welding symbol annotation.
- Alternative:
To offset the weld symbol on the opposite side of
the reference line. Click the
Alternative
welding staggered display
") to activate the alternative welding staggered
symbol.
to activate the alternative welding staggered
symbol.
-
Type the desired values in the upper and/or lower field(s).
-
If you want to add complementary indications like a field weld or a weld tail, for example, click the appropriate button.
-
Click OK.
The welding symbol is created.
-
If needed, modify the welding symbol position by dragging it to the required location.
-
Double-click the welding symbol to edit it, and change the weld text side for example by clicking the Up/Down switch button.
- You can reset the current style values in the Welding creation dialog box at any time using the Reset button.
- At any time, you can modify the welding symbol. To do this, double-click the welding symbol to be modified and enter the modifications in the displayed dialog box.
- You can import a plain text file (.txt) to use as a reference (specification, process or other) by clicking the Import File button.
![]()