in a separate .CATPart document, keeping the link to the engineering .CATPart.
![]()
Prepare the model as described in Preparing for Synchronization.
Open the ManufacturingData1.CATPart document.
-
Click Manufacturing Document
 in the Manufacturing toolbar.
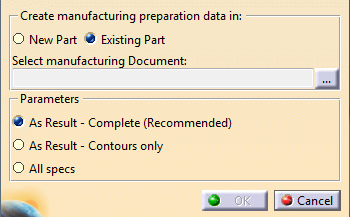
The Manufacturing data generation dialog box is displayed.
-
Choose whether you want to create the manufacturing data in a new or an existing part.
-
New part:
A new .CATPart document opens and manufacturing data are created in this part. -
Existing part:
This option is useful if you want to generate the manufacturing preparation data in a precise CATPart.
Click ...
The File Selection dialog box is displayed.
Select the manufacturing document (CATPart).
Click Open.
Manufacturing data is created within this part.
-
New part:
-
Select the creation method:
-
As Result - Complete
(Recommended)
- Features that are stacking inputs are converted to datums.
- Stacking features such as plies group rosettes and surfaces, cores, plies contours, neutral fiber, flatten plane , EOP... are also converted to datums.
- Depending on their impacts on other features, some other features are also converted to datums.
This method results in a good performance, a lighter and more stable manufacturing part.
-
As Result - Contours
only
-
All
the
composites
features
are
created
and
synchronized
as such in the
manufacturing
part
except
for
contours:
- History of the ply contours is not kept,
- The links to geometry are not kept except that to the support surface.
- All the features constituting the engineering contour
are merged into one As Result contour.
This As Result contour is managed as any other contour
(e.g. you can apply material excess or darts, etc. to it).
This method increases the performance, reduces the size of the manufacturing data.
No need to validate the manufacturing data in case of updates.
-
All
the
composites
features
are
created
and
synchronized
as such in the
manufacturing
part
except
for
contours:
-
All Specs
- All the composites features are created and synchronized as such in the manufacturing document, together with their inputs.
This method increases the computation time and the size of the manufacturing data.
- The check is done ply by ply.
- Status are displayed for each ply:
- Created: A ply has been created during the operation,
- Deleted: A ply has been deleted during the operation,
- Modified: A ply has been modified during the
operation.
In this case, the details of the modification will be given:- Material has changed,
- Orientation has changed,
- Resulting contour has changed.
The details of the modification are only listed during the creation of the manufacturing part
or during synchronization.The contours in the As Result manufacturing part are marked with a red cross.
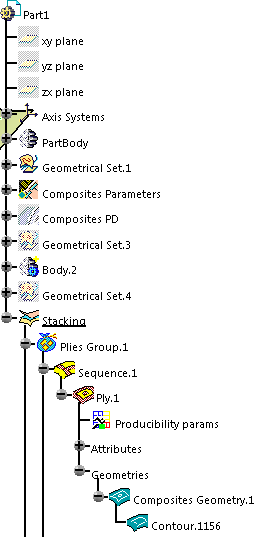
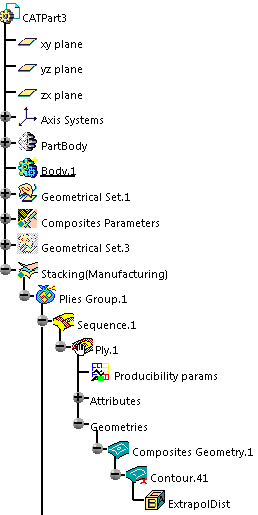
Engineering Stacking:
Manufacturing Stacking - All Specs:
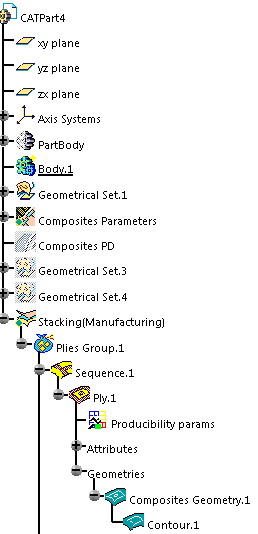
Manufacturing Stacking - As result - Complete:
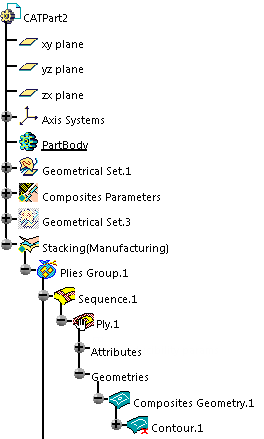
Manufacturing Stacking - As result - Contour:
-
As Result - Complete
(Recommended)
-
Click OK. The manufacturing document is created according to the selected method.
- Core samples and numerical analysis will not be generated in the manufacturing preparation data.
- Only a simple copy (with no link) of the producibility parameters will be generated.
Skin Swapping and Material Excess are available in the Manufacturing Toolbar.
![]()