-
Select the feature where you want to place the insert.
It can be a ply, a sequence, a plies group or a stacking.
In our example we selected Plies Group.1. -
Click Core
 in the Plies toolbar.
The Core definition dialog box is displayed.
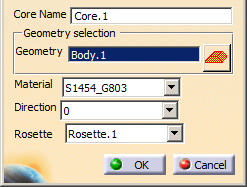
Select Solid.1 as the Geometry.
Choose a Material from the list.
Choose a Direction from the list.
Choose a Rosette from the list.
See About Rosette and Rosette Transfer Type for more information.
Both Direction and Rosette enable to orientate the insert's cells. -
Click OK to create the insert.
-
Perform the same operation with Plies Group.2, by selecting Solid.2 as the Geometry.
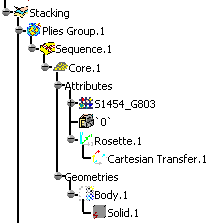
The core (identified as Insert.xxx) is stored in the specification tree
and contains the Material and Direction attributes, as well as the Solid geometry.
![]()