 |
Creating a Drop-Off with a
Slope Angle
-
Click Drop Off
 in the Preliminary Design toolbar.
The Drop Off dialog box is displayed.
A graphic icon within
the dialog box illustrates the parameters required.

-
Select Extrude.1 as the
Reference surface.
The dialog box
is updated accordingly.
-
Select Extract.5 as the
Drop Off curve.
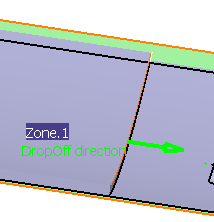
The Drop-off direction is displayed in the 3D view.
Click
Reverse, or the arrow in the 3D view, if the Drop-off direction
is not correct.
-
Key in 1.5 as the Slope angle value.
-
Click Preview:

-
Click OK to validate and exit the dialog box.
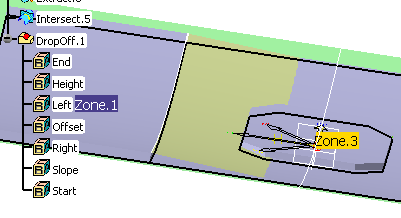
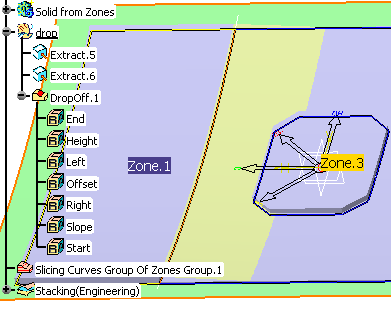
The drop-off is created:

Creating a Drop-Off from a Drop-Off Curve and a
Bottom Curve
-
Close DropOffSA1.CATPart
without saving it and re-open it.
Recall Intersect.5 from the NoShow.
-
Click Drop Off
in the Preliminary Design toolbar.
The Drop Off dialog box is displayed.
A graphic icon within
the dialog box illustrates the parameters required.
-
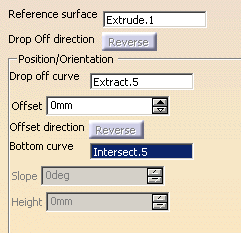
Select Extrude.1 as the Reference surface.
The dialog box
is updated accordingly.
-
Select Extract.5 as the Drop-off curve.
-
Select Intersect.5 as the Bottom curve.
Slope and Height become inactive as they are no
longer required to define the drop-off.
Click Preview:

-
Click OK to validate and exit the dialog box.
Creating a Drop-off from a Ply Border
-
Open DropOffSA2.CATPart.
-
Click Drop Off
in the Preliminary Design toolbar.
The Drop Off dialog box is displayed.
A graphic icon within
the dialog box illustrates the parameters required.
-
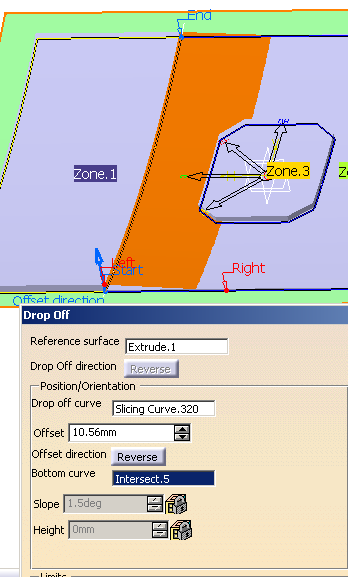
Select Extrude.1 as the Reference surface.
The dialog box
is updated accordingly.
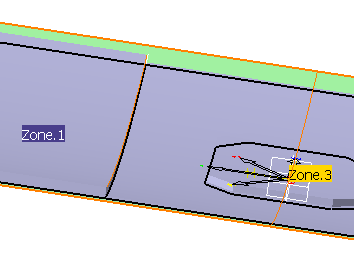
-
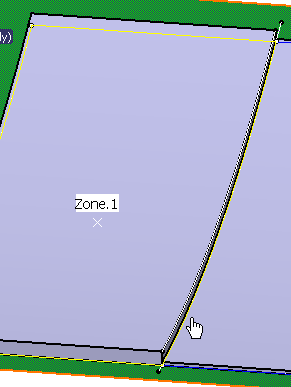
Select a ply border as shown below as the
drop-off curve:
-
The Drop-off direction and the
Offset direction are displayed in the 3D view.
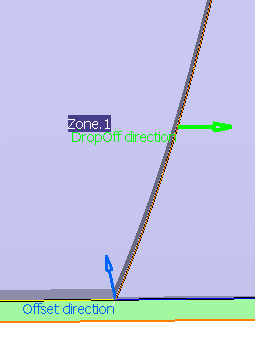
If they are not correct, click the arrow to reverse it, or click
Reverse in the dialog box.
-
Key in an Offset value (here 10.56)
and select a bottom curve
(or key in the Slope and
Height values if the bottom curve does not exist).
Click Preview.
-
Click OK to validate and exit the
dialog box. The drop-off is created:
|