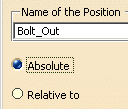
This procedure describes how to create a manufacturing position. A manufacturing position is used as a building block in the creation of 3D States. If you are using data saved to the Manufacturing Hub, you can also publish and save positions.
Each position is an object that is saved with respect to a given product or resource. Positions are subnodes in the PPR tree, and can be edited.
Create Position
Arrange the parts or resources into a position you want to save, e.g., the piston pin out of the piston.
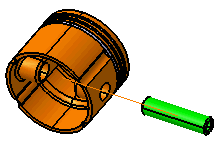
Use the positioning tools (such as the Compass, Snap tools, etc.) to position items and resources assigned to a given activity. -
Click Create Positions
 and select the part (e.g., piston pin).
The Create Position for Item Piston_Pin dialog box appears. 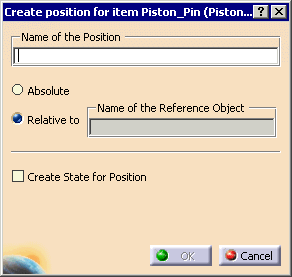
-
Enter a name of the position (e.g., Pin_Out), and select the product or resource to which the part's position is relative (e.g., the Piston).
-
Click OK.
The manufacturing position is added to the Mfg Positions node under the part or resource's node (e.g., the Piston Pin. 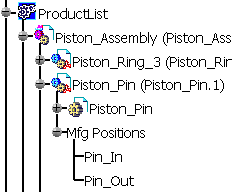
-
Move the parts into a new position (e.g., move the piston rod into the piston).
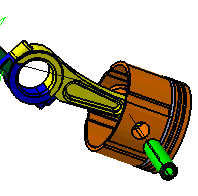
-
Create a new position by clicking Create Positions
 .
. -
In addition to naming the position and selecting the part to which its position is relative, select the Create State for Position checkbox.
When the check box is selected, a field appears into which you enter the name of the new state. 
The new manufacturing position and 3D state appear in separate nodes under the product with which they are associated. 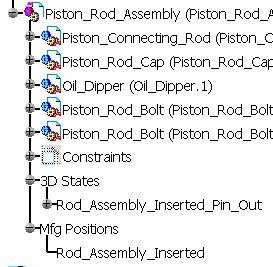
Publish Positions to Manufacturing Hub
|
|
Licensing |
| This command is not available unless you have a license for the Manufacturing Hub and are working with data loaded from the Manufacturing Hub. |
-
Click Publish Positions
 .
.
The positions are published in XML format as detailing within the project in the Manufacturing Hub. This command only needs to be run once during an editing session. It computes any changes from the design position caused by any of the activities (including simulation activities) and calculates the end position for each activity or resource. These positions can later be visualized within the Work Instructions Composer (separate license required). For simulation activities, the settings in Tools > Options > DELMIA Infrastructure > Simulation tab affect how the positions are captured. -
Save the project into the hub.
Notes
-
Note that if the new position is not immediately visible under the product node, double-click the product node to refresh its view.
-
Once the position object has been created, the location of the positioned object is stored. The process document must be saved to retain the data for subsequent V5 sessions.
-
After a position object has been created, the saved part positions can later be modified. If a reference resource is moved, any objects that are positioned based on its location will also be moved accordingly.
-
If a reference resource is deleted, its corresponding position object is not automatically deleted. The position object must be deleted manually by the user, and a warning is displayed during process verification. Similarly, when a part or resource is unassigned from an activity, the position of the part/resource is not automatically deleted. This position should be deleted manually to avoid any unpredictable errors that may otherwise occur.
-
A manufacturing position object can be deleted in the same way that any object in the PPR tree can be deleted: select the position and then select Edit > Delete.
-
A MA is a repository for parts. An MA does not store any position information. The positions of parts inside a MA are the positions of parts as seen in the Product List.
-
By default, the Relative to option is selected. You can select Absolute instead, in which case, the field showing the name of the relative part disappears.
