Measures can be used in formulas. A set of results (length, angle, etc.) is associated to each measure feature in the specification tree. Each piece of information can be used to create parameters in formulas or to create geometry. To read more, see specifying measures in formulas.
It is not possible to add New parameters under Measure Feature.
Measures can also be used to valuate parameters. When doing so, an associative link between the measure and parameter is created.
This task explains how to create a point on the measured center of gravity of a part.
Have completed the task on associative measures.
In ENOVIA DMU, you need a Part Design license to complete this task.
-
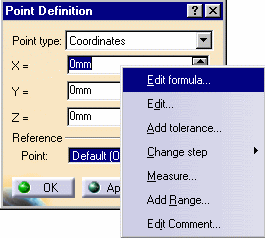
Create a point using the Point command. The Point Definition dialog box appears for you to enter point coordinates.
-
Right-click the X= field and select Edit formula... from the contextual menu.

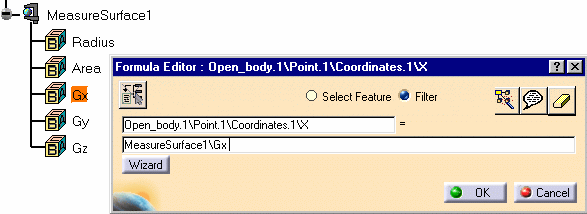
The Formula Editor dialog box appears letting you define the x coordinate by a formula.

-
Select the measured X coordinate in the specification tree, then click OK.

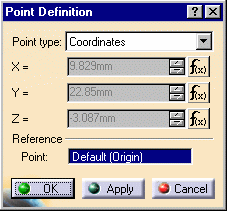
The Point Definition dialog box is updated.
-
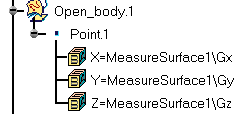
Repeat for Y and Z coordinates.

-
Click OK in the Point Definition dialog box to create the point at the measured center of gravity of the part.

-
(Optional) Create a line on the point using the Line command, then move the object using the 3D compass and see everything update automatically.
![]()