-
Select the required component.
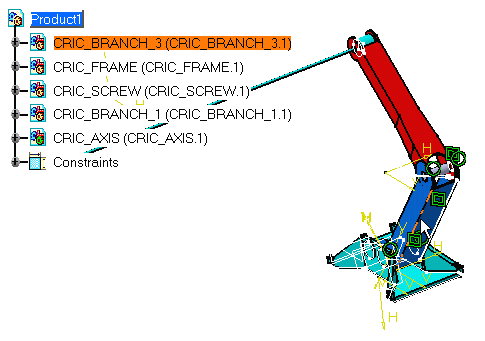

You can also analyze the dependencies of your assembly by selecting the root of the tree. -
Select Analyze > Dependencies....
The Assembly Dependencies Tree dialog box appears. 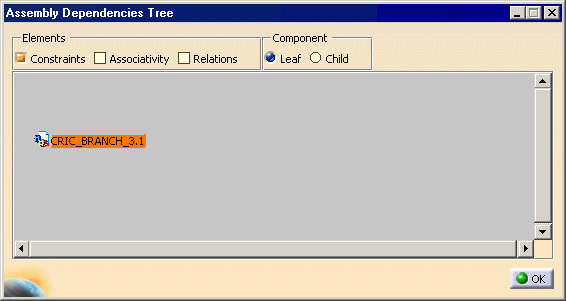
-
Right-click the selected component and select Expand node.
The constraints defined for this component then appear: 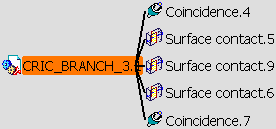
-
Right-click the selected component and select Expand all.
Now, the constraints and components related to the component you have selected are displayed: 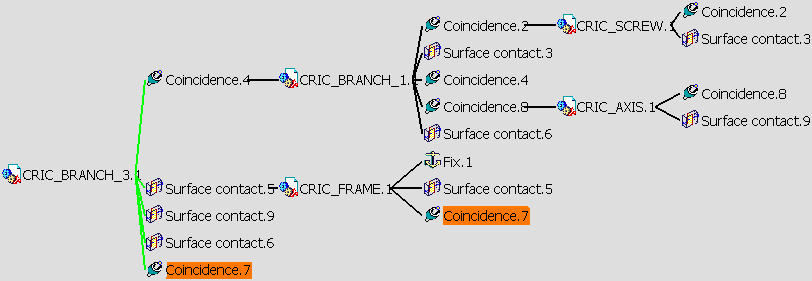
You can notice that the following constraints exist from CRIC_BRANCH_3 as shown in the image above. - a coincidence constraint with CRIC_BRANCH_1.1: Coincidence.4
- a surface contact constraint with CRIC_FRAME.1: Surface contact.5
- a surface contact constraint with CRIC_AXIS.1: Surface contact.9
- a surface contact constraint with CRIC_BRANCH_1.1: Surface contact.6
- a coincidence constraint with CRIC_FRAME.1: Coincidence.7
-
Checking the different options available in the Elements frame.
You can display the following: - Constraints: by default, this option is activated
- Associativity: shows components edited in Assembly Design context. See Designing in Assembly Design Context. Contextual components are linked to support components by green lines in the graph.
- Relations: shows formulas. For more information, please refer to Knowledge Advisor User's Guide.
The above options must be activated for parent objects so that the dependencies of the child objects can be seen.
-
You can also display the relationships by filtering the components you wish to see. Either check the Child option to take the children of the component into account or check Leaf to hide them.
-
Click OK to close the dialog box.