Wall surfaces connect the top surfaces to the binder.
-
Select any simple wireframe with one domain as the support.
If necessary, start Area Selection to define a portion of the wireframe as the support.
 -
Go to the More tab to define parameters.
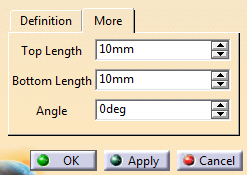
Click Apply.
The wall surface is created on the selected wireframe.-
Optional: Edit the parameters and click Apply.
The wall surface is updated accordingly. -
In the contextual toolbar, click
 to invert the orientation of the wall surface.
 -
Click OK.


![]()