-
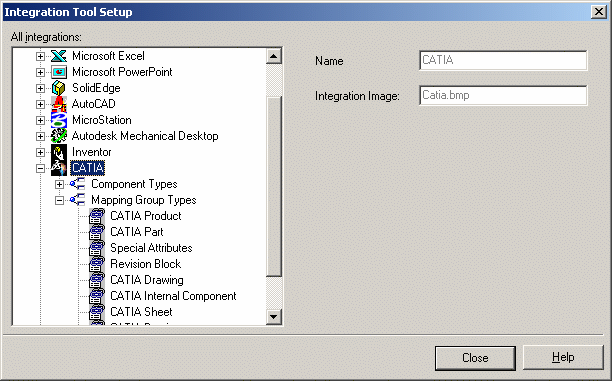
Launch the Integration Tool Setup utility.
The Integration Tool Setup dialog box appears. -
Double-click on CATIA or select the "+" sign to display the options associated with CATIA.
-
Double-click Mapping Group Types or select the "+" sign in front of it.
-
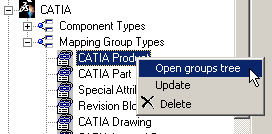
Select the CATIA Product mapping group type then right-click and select Open groups tree:
-
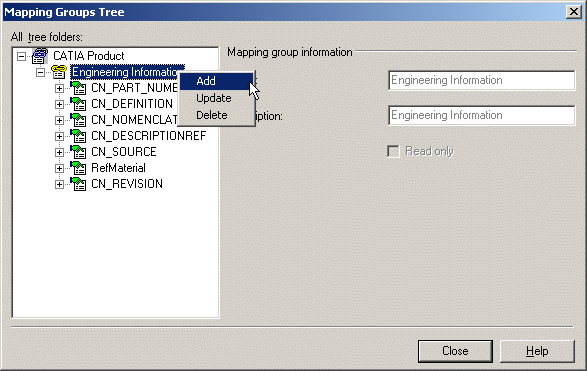
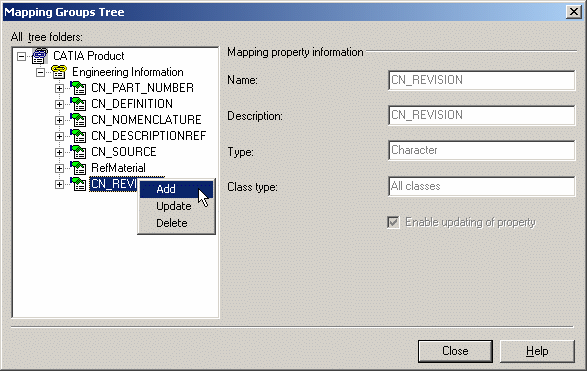
In the Mapping Groups Tree window, select the Engineering Information item then right-click and select Add.
-
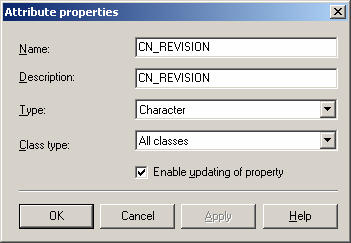
In the Attribute Properties dialog box, complete all fields as shown below, then click on OK:
-
Back in the Mapping Groups Tree dialog box, right-click CN_REVISION then select Add.
-
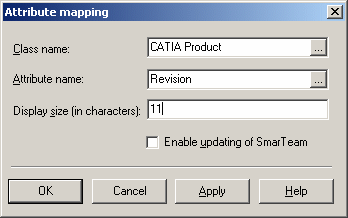
In the Attribute Mapping window, complete the Class name and Attribute name field as shown below then click on OK.
-
Recommendation: When you assign a component type such as "CATIA Part" to two classes, e.g., CATIA Part and CATIA Standard Part in Integration Tools Setup, attribute mapping is performed for all of the attributes of the assigned classes (duplicates inclusive), regardless of the “Save as” class chosen during the Save operation.
If the mapping direction of an attribute in one class is disabled and the same attribute exists in the other class with a mapping direction enabled, the mapping direction of the latter is considered.
Note: This behavior occurs only during the first Save of the document in SmarTeam.