|
-
Click Sew Surface
 in the Operations toolbar (Trim-Split sub toolbar).
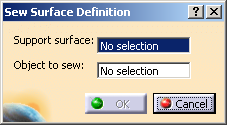
| The Sew Surface Definition dialog box appears. |
 |
-
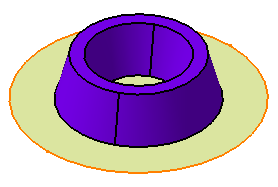
In the Support surface box, select the surface
onto which the other should be sewed.
-
In the Object to sew box, select the surface
to be sewed.
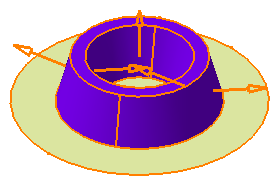
An arrow appears indicating the side where material will be added or
kept. Note that clicking this arrow reverses the given direction.
-
In the Deviation box, choose the deviation tolerance
computation mode:
| Option |
Description |
| None |
No tolerance is considered for the feature
computation. |
| Automatic |
The previous deviation value is selected.
|
| Manual |
In the Max Deviation text box, you
can specify a user-defined tolerance. |
 |
- The result is computed with a default tolerance value
which depends on the scale selected in the Design
Range list in the Design Limits area in Tools >
Options > Parameters and Measures:
Small range: 0.001
Normal range: 0.1
Large range: 10
- The User defined value must be less than the Design
range*100.
|
-
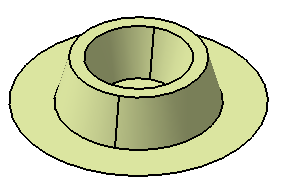
Click OK.
The surface is sewn onto the object.
The feature (identified as SewSurface.xxx) is added in the
specification tree.
|