These linear segments may be connected by a blending radii.
Polylines may be useful to create cylindrical shapes such as pipes, for example.
Open the Spline1.CATPart document.
-
Click Polyline
 .
.The Polyline Definition dialog box appears. 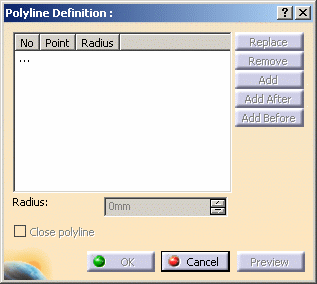
-
Select several points in a row.
Here we selected Point.1, Point.5, Point.3 and Point.2 in this order. The resulting polyline would look like this: 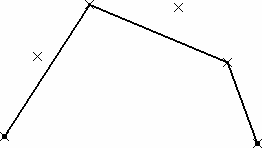
-
From the dialog box, select Point.5, click the Add After button and select Point.6.
-
Select Point.3 and click the Remove button.
The resulting polyline now looks like this: 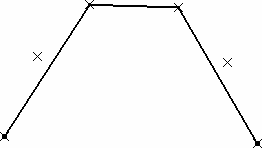
-
Still from the dialog box select Point.5, click the Replace button, and select Point.4 in the geometry.
The added point automatically becomes the current point in the dialog box. -
Click OK in the dialog box to create the polyline.
The element (identified as Polyline.xxx) is added to the specification tree. 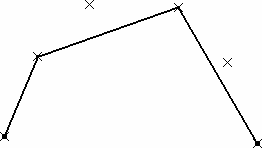
-
Double-click the polyline from the specification tree.
The Polyline Definition dialog box is displayed again. -
Select Point.6 within the dialog box, enter a value in the Radius field, and click Preview.
A curve, centered on Point.6, and which radius is the entered value (R=30 here) is created. 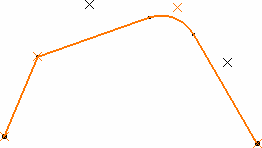

-
Click OK to accept the new definition of the polyline.
-
The polyline's orientation depends on the selection order of the points.
-
You can re-order selected points using the Replace, Remove, Add, Add After, and Add Before buttons.
-
You cannot select twice the same point to create a polyline. However, you can check the Close polyline button to generate a closed contour.

-
![]()