 |
This task shows you how to fix -
or rejoin - routables in which segments have become separated. In the illustration below,
the dotted line - the broken routable indicator - shows that a run has become separated at
that point. This task also shows how to synchronize the routables
from earlier versions. 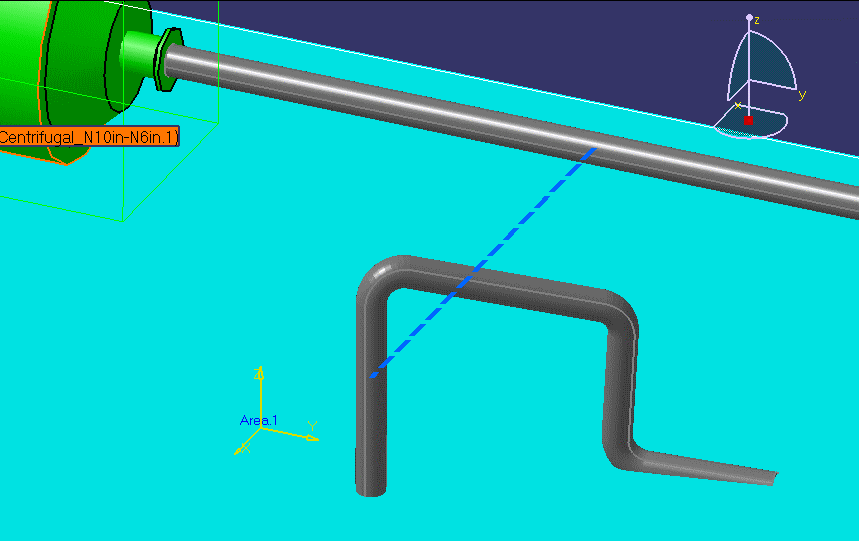
You can re-join the run in one of several ways, depending on the nature of the break
and your requirements. The methods are as follows: |
 |
1. |
Bring up the
Definition
dialog box for the run, then place the mouse pointer over the broken routable
indicator and click the right mouse button. This will display a pop-up menu. Click
Create Segment. |
|
2. |
Bring up the Definition dialog
box, then drag one of the segment handles to re-join the run. |
|
3. |
Bring up the Definition dialog box. An arrow will display at
each end of the broken routable indicator. Drag one of the arrows (depending on
circumstances) to re-join the run. In the illustration below, one segment of the run
has been moved to connect to the portion of the run still connected to the pump. 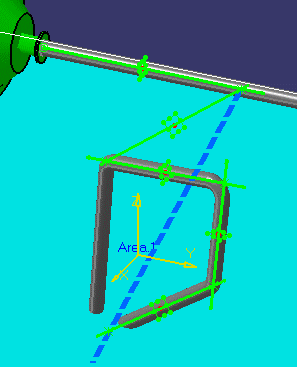
|
|
4. |
In certain cases you will see the
Auto
Route option beneath the Create Segment option in the
pop-up menu (See Step 1). This happens when a segment connecting two parallel routables
(which are on different X-Y planes) is broken.
- Select Auto Route. The Auto Route
dialog box appears.
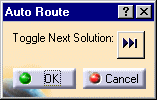
- Click on the Toggle
 button. Options for re-joining the run will be shown as a
dotted line.
button. Options for re-joining the run will be shown as a
dotted line.
- Click OK to make your selection.
|
| |
|
|
| |
|
Fixing Out-of-Sync Routables
|
|
|
In certain cases, for routables created in earlier versions
of CATIA, the visualization of the run may not be in synchronization with
the Run definition. This task shows you how to manually synchronize such
routables. |
| |
|
When routables created in earlier versions of CATIA are
opened, the visualization of the run may not be in synchronization with the
Run definition. In such cases, a yellow square dot is displayed at the
broken node. The yellow dot is visible at:
- The first node which is not synchronized with the Run
definition.
- The last node, when all the nodes are synchronized but the
number of nodes displayed are less than the required nodes.
|
|
|
|
1. |
To synchronize the run, select any one of the following ways, depending on
the nature of the break and your requirements:
- Place the pointer on the unsynchronized routable,
right-click and select xxx object >
Definition.
The Definition
dialog box appears.
- Click Apply.
- Click OK to close the Definition dialog
box.
The yellow dot disappears. The run is synchronized with the Run
definition.
or
|
|
| |
|
- Select the unsynchronized routable in the
specification tree. Right-click and select
xxx object
> Definition.
The Definition
dialog box appears.
- Click Apply.
- Click OK to close the Definition dialog
box.
The yellow dot disappears. The run is synchronized with the Run
definition.
|
|

|