-
Click Mesh Tools
 in the Styling Surfaces toolbar.
You can also access this command by pressing ALT+SHIFT+T.
-
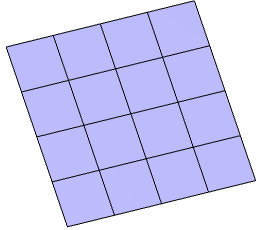
Select the surface.
The Tools Palette appears.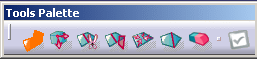
-
Click Add Face
 (if not already selected).
- Click an edge to extrude it, or

- Click an edge and move the mouse to extrude in the direction
defined by the manipulation (in the view plane), or

- Click and use the Ctrl key to extrude in corner (as for a fill).
You can also access this command by pressing Ctrl+Shift+J.
The face is created by an extrusion along a direction.
- Click an edge to extrude it, or
-
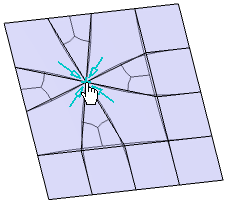
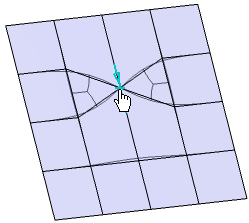
Click Move Vertex
 and move the preselected
vertex in the face that is the closest to the mouse.
and move the preselected
vertex in the face that is the closest to the mouse.You can also access this command by pressing Ctrl+Shift+M.
The Tools Palette is modified to show the Attenuation
 icon.
icon.
A plane is previewed by an arc of a circle on the manipulator.
Note: Pressing the Ctrl key lets you manipulate the vertex along the edge (i.e. the mesh line) that is the closest to the mouse. An arrow previews the direction of manipulation. -
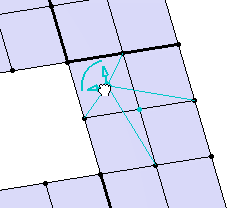
Click Cut Face
 and select the starting and end point.
You can also access this command by pressing Ctrl+Shift+U.
It lets you cut the face from a point on an edge to another point on another edge belonging to the same face or a different face.

- When a cut is made, the end point of the first cut is by default the starting point of the following cut. Therefore when you select an ending point that is not on the same face as the starting point, it becomes a new starting point.
- When cutting a face, surface continuity is required between the start and end point.
-
Pressing the Ctrl key lets you select the closest vertex.
-
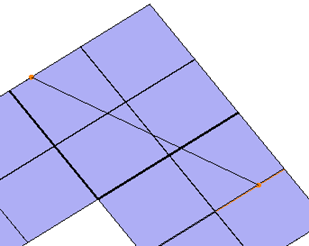
Click Cut Mesh by Plane
 and select the
starting and end points.
and select the
starting and end points.You can also access this command by pressing Ctrl+Shift+W.
It lets you to cut all the faces that have an intersection with the plane (defined by two points and orthogonal to the view):
You can select an existing plane (click  first to
be able to select it).
first to
be able to select it). -
Click Merge Vertices
 and select either:
- A face:
All the vertices of this face are merged on a single vertex. By default, this vertex is positioned in the barycenter of the vertices to be merged.
You can change the position of the vertex by left-clicking and moving the mouse. - An edge:
All the vertices of the edge are merged on a single vertex. By default this vertex is positioned in the middle of the edge.
You can change the position of the vertex by left-clicking and moving the mouse. - A vertex:
Select a second nearby vertex to merge the first vertex with this one:
You can change the position of the merged vertex by left-clicking and moving the mouse once you have selected the first vertex.
You can also access this command by pressing Ctrl+Shift+V.
- A face:
-
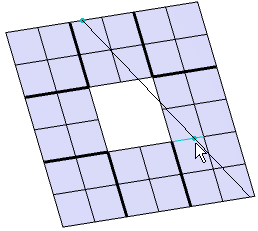
Click Regularization
 to replace the N side faces by triangles and quadrangles and select the
face to regularize
to replace the N side faces by triangles and quadrangles and select the
face to regularizeYou can also access this command by pressing Ctrl+Shift+T.
Before After 
This command is available if you have only one current regularization to perform.
-
Click Erase
 to erase either:
- a face.
- an edge.
Note: You cannot erase a border edge. - a vertex.
You can also access this command by pressing Ctrl+Shift+D.
-
Click Apply (Enter)
 to validate the command.
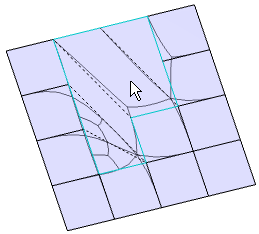
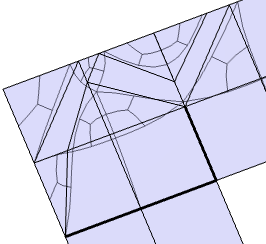
When a face is made of more than four edges, it is automatically built from a face made of three or four edges only. These internal edges are displayed as dashed lines:
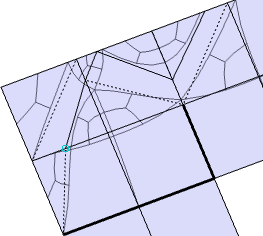
These dashed lines become continuous and can be manipulated once you validate the command.
In the Modification toolbar, you can click Multi-Selection  to validate the current operation and select the next
face modify its mesh without exiting the Mesh Tools
command.
to validate the current operation and select the next
face modify its mesh without exiting the Mesh Tools
command.
You can also press Ctrl +Space to validate the current operation and select the next face to modify its mesh.
![]()