Creating a Subdivision Instance
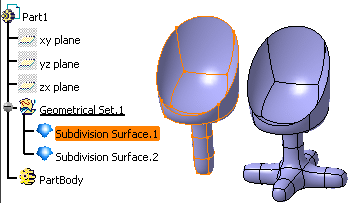
Open the Chair3.CATPart document.
-
Two subdivision surfaces have been created.
-
Select Type as 1 in the Tools > Options > Shape > Imagine & Shape > Display tab, Base Mesh, Line area.
-
Right-click Subdivision Surface.1 object and select the IMA - Instantiate contextual command.

To access this command, you can also: - Press ALT+SHIFT+I.
- Click Instance Creation
 from the Operations toolbar.

You can use this command only for the following features:
- Subdivision surface
- Instance surface
- Symmetry surface
- Net Surface
- GSD rectangular and circular pattern
from Subdivision surface
A separate subdivision surface is created for each instance of the pattern.
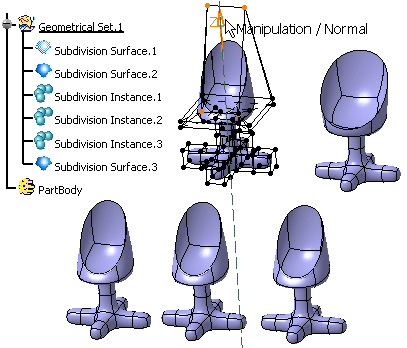
An instance of the subdivision surface is created at the same place as the original feature and is added in the specification tree as Subdivision Instance.1.
- You can create as many instances as required by repeating the process.
- You can move the individual instances using the main compass.
-
Repeat step 1 and create two other instances of first chair type.
There are now three instances of Subdivision Surface.1: Subdivision Instance.1, Subdivision Instance.2 and Subdivision Instance.3.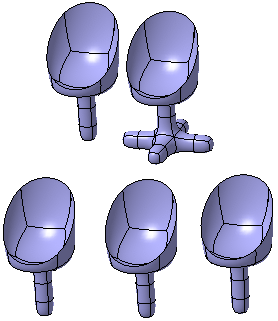
- When selecting the instance for modification, you are automatically directed to the parent element.
- Any modification done to the parent element is automatically
propagated to all the instances of that subdivision surface.
-
To replace the parent feature, right-click Subdivision Surface.1 and select the Replace... contextual item.
The Replace dialog box is displayed. -
Select Subdivision Surface.2. All the instances are replaced with the selected new parent element.
In this case, all three instances of first chair type are replaced by second chair type.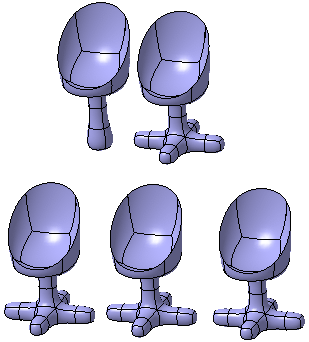
-
To break the link between the parent and the instance, right-click Subdivision Instance.3 object and select the IMA - Convert Into Subdivision contextual item.
You can also access this command by pressing ALT+SHIFT+C. A new subdivision surface (Subdivision Surface.3) is created from Subdivision Instance.3. The modifications done to the parent subdivision surface are propagated only to its instances and the converted subdivision surface is not modified.
- The new subdivision surface is created identical to the instance and on the same place as the instance.
- You can move the subdivision surface using the main compass or the Modification command.
Modify a Subdivision Instance
Open a 3D part with subdivision surface and its instances.
-
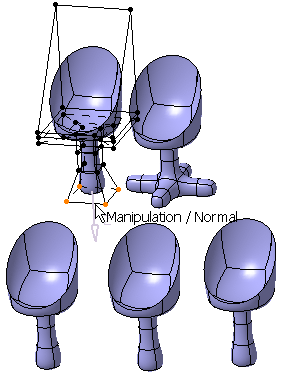
Double-click the Subdisivion Instance.x in the specification tree.
The Tools Palette is displayed.

For information on the Transformation commands, see Modifying and Deforming Surfaces.
![]()