Create a sphere.
-
Click Dimension
 in the
Modification toolbar.
 -
Select a subdivision. The dimensions for the entire meshed surface are displayed.
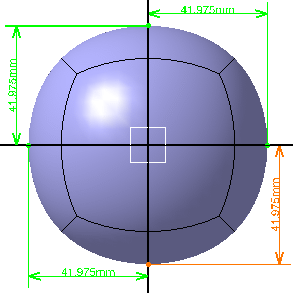
A Tools Palette is also displayed:

The following icons let you: -
 Defines the type of dimensioning transformation.
There is one button for all the three different states. A click on the deformation type icon modifies its state:
Defines the type of dimensioning transformation.
There is one button for all the three different states. A click on the deformation type icon modifies its state:-
 1D transformation: The vertices move along the direction of the selected dimension.
 -
 2D transformation: The vertices move along the two displayed directions.
 -
 3D transformation:
The vertices move along the three displayed directions.
-
-
 Half Axis Deformation Mode:
Defines the dimensioning transformation along half axis. This
mode is available for
1D transformation only.
 -
 Automatically changes the view point to the closest view plane
of the axis system.
 -
 Modifies the origin and orientation of the compass to define new
axis system.
The compass definition options (reset, translation, rotation, pick geometry, edition, attenuation, selection filters), which are available in the Tools Palette define the new position and orientation of the axis system. For more information, refer to Managing the Compass.
-
- Select 2D transformation.
-
Click the dimension to modify it.
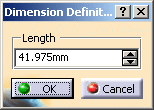
The Dimension Definition dialog box is displayed.
-
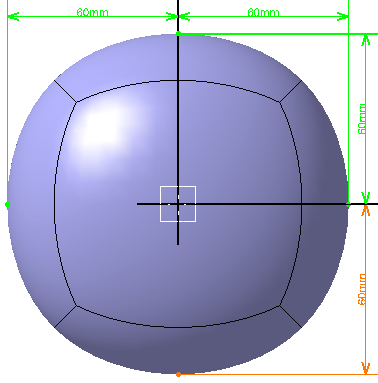
Enter the value or use the spinners to change the value. In this case enter 60mm.

In the Modification toolbar, click Multi-Selection  to validate the current operation and select the next
surface without exiting the
Dimension
 command.
You can also press Ctrl +Space to validate the current operation and select the next object to display the dimensions for the entire meshed surface. -
Click OK.
The vertices of the subdivision surface are modified depending on the type of transformation.
-
When a dimension is modified, all the dimensions along that direction are also modified.
-
The dimensions are computed from the current axis system (i.e. either the default axis system of the part or the one you have selected) to the extreme end of the surface.
-
The dimensions by default are displayed in the two most seen directions.
-
If the view point is changed, then the displayed dimensions could change.
-
The deformations are not commutative. If you change the dimension and again go back to the original dimension, you may not get the exact same shape.
-
This function works with a precision lower than 0.1 mm. If the precision level exceeds this limit a warning message is displayed.
-
You can undo the command if you are not satisfied with the dimension modification.
-
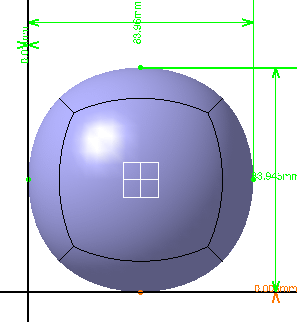
You can define an axis system during the command using the compass and the dimensions are recomputed from the axis.
-
Before you click the Dimension command, you can select an already existing axis system, which is used as reference to display the dimension from this axis. Any modification in the dimension is in reference with this axis.
You can select the axis system Axis Systems.1 and compute dimensions from it.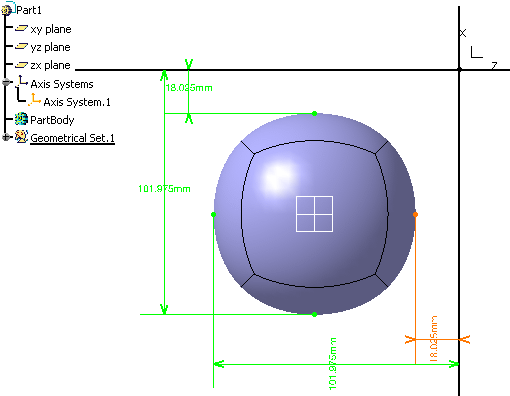
-
The display of the projection plane depends on the option selected for transparency in Tools > Options > Display > Performance tab, Transparency Quality area. The options are:
-
Low (Screen Door)
-
High (Alpha Blending)
For more information on these options, see CATIA Infrastructure User's Guide: Customizing: Customizing settings: Performance.
-
Dimensioning Along Half Axis
Open the
Dimension1.CATPart
document.
The CATPart must have at least three vertices on each axis, so as to
have the axis divided into two. In case of insufficient number of
vertices this functionality does not work and dimensioning functions as
before (for entire axis).
-
Click Dimension
 .
. -
Select a subdivision. The dimensions for the entire meshed surface are displayed.
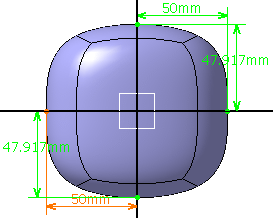
A Tools Palette is also displayed.
-
Select 1D transformation
 and
Half Axis Deformation Mode
 in the
Tools Palette.
 -
Click the dimension to modify it. In this case select the 50mm dimension.
The Dimension Definition dialog box is displayed.
-
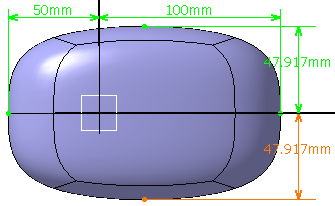
Enter the value or use the spinners to change the value. In this case enter 100mm.
-
Click OK.
The vertices of the subdivision surface are modified along half the axis without moving or modifying dimension along other axis.
![]()