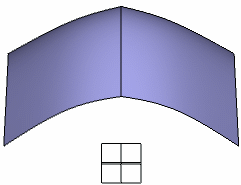
- no intersection between the subdivision surface and the symmetry plane
- intersection between the subdivision surface and the symmetry plane.
-
Click Symmetry
 from the Operations toolbar.
 -
From the Tools Palette, click one of the following:

Option Description Shortcuts  Surface
Selection
Surface
SelectionSelects a surface. Ctrl+Shift+J  Plane
Selection
Plane
Selection Selects a plane. Ctrl+Shift+P  Plane Manipulation
Provides options to manipulate the plane.
After clicking Plane Manipulation, new commands appear in the Tools Palette:

Option Description Shortcuts  Define Robot Plane
Defines a plane using the subdivision mesh. Ctrl+Shift+C  Reset Robot
Resets the plane. Ctrl+Shift+D  Reverse side
Inverts the side of the symmetry.
Note: You can also click the arrow in the work area.Ctrl+Shift+I  No faces cut the symmetry plane
Generates a better result when the symmetry plane cuts the faces diagonally. A slider lets you manage the weight of the edges located on the symmetry plane.
Click
to switch to Possible faces cutting symmetry plane
 .
.Ctrl+Shift+W  Sharp to Smooth
Click Sharp to Smooth to switch to Smooth to Sharp
 .
.
This option is available for selection only if No faces cut the symmetry plane
is selected.Ctrl+Shift+H  Plane Translation
Translates the plane. Ctrl+Shift+T  Plane Rotation
Rotates the plane. Ctrl+Shift+R  Edition
Defines the position, angles, dimensions, and weight related to the selected elements. Ctrl+Shift+E  Attenuation
Defines the attenuation for the displacement of the handle. Ctrl+Shift+I  Symmetry Feature
Creates a Subdivision Symmetry.x feature as a result.
 By default, this option is selected.
Ctrl+Shift+Z  Subdivision Feature
 Creates a Subdivision Surface.x feature as a result. Ctrl+Shift+Q
-
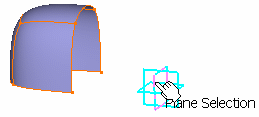
Select a surface. You can also select multiple surfaces.
The Plane Selection
becomes active. -
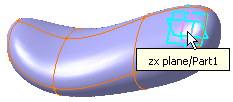
Select the plane.
You can also select the plane first then the surface. In this case, the Surface Selection
becomes active. - No intersection between the subdivision surface and the symmetry plane:
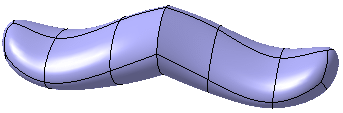
The result is the mathematical symmetry by a plane: 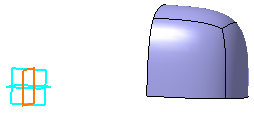
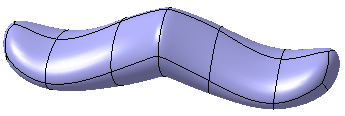
- Intersection between the surface and the plane:
In this case, the surface is made of two parts separated by the plane. A side of the surface is automatically chosen, corresponding to the bigger side: 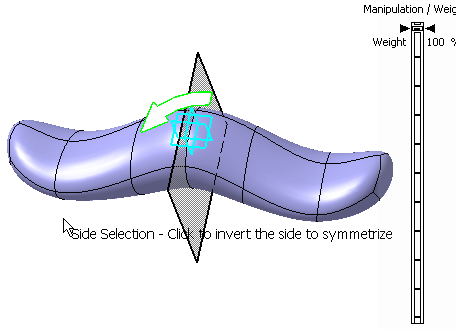
A new icon
appears in the Tools Palette to let you choose the side.
- No intersection between the subdivision surface and the symmetry plane:
-
In the Modification toolbar, click Multi-selection
 to select multiple items. Click Multi-selection
again when the selection is complete.
to select multiple items. Click Multi-selection
again when the selection is complete. -
Select Side Selection
or
click in the 3D area to invert the side of the symmetry.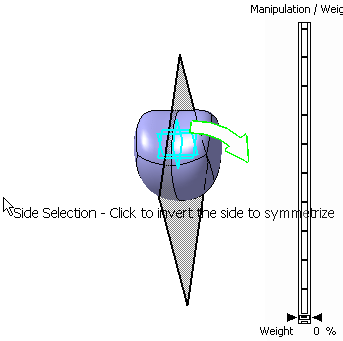
-
Click
to
add weight to the intersection (scar) of symmetry. You can also access
this command by pressing ALT+SHIFT+H. A click on the
attraction type icon modifies its state. The icon has two states:-
Sharp Attraction: Selecting this gives a
sharp edge.
-
Smooth Attraction: Selecting this gives a
smooth edge.
The value of the weight, displayed on the right of the screen can be changed between 0 and 100.
-
- Drag the scale manipulator to add the required weight to the surface.
- Selecting multiple subdivision surfaces with
Ctrl
or from specification tree, will create multiple subdivision symmetries.
-
The side on which the symmetry instances are obtained, remains same for all the selected surfaces.
-
The weight of sharpness or smoothness remains same for all the selected surfaces.
-
- The symmetry keeps the curvature continuity of the subdivision surface, therefore some details of the input mesh will be modified.
- Previous operations performed on the input surface are also kept.
- The result of the symmetry is a subdivision surface. Thus, you can perform a symmetry of a symmetry or copy-paste a symmetry or use this feature to associate other subdivision surfaces.
- The display of the projection plane
depends on the option selected for transparency in Tools >
Options > Display > Performance tab, Transparency Quality
area. The options are:
-
Low (Screen Door)
-
High (Alpha Blending).
-
For more information on these options, see CATIA Infrastructure User's Guide: Customizing: Customizing settings: Performance.
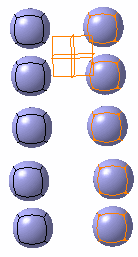
- If the surface is U-shaped, you cannot select a
side as it is automatically chosen:

- If the symmetry plane intersects a S-shaped surface, the symmetry cannot be
performed.
Below is an example using the highlighted plane: the symmetry cannot be performed. 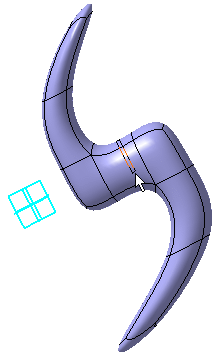
Below is an example using the red highlighted plane: the symmetry can be performed. 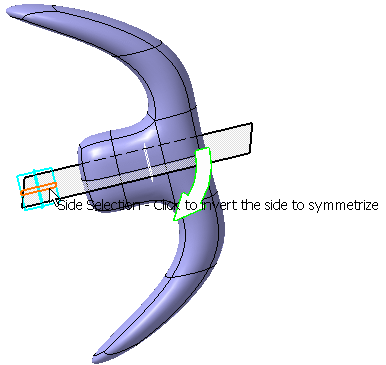
- If the face of the surface has only one vertex on the chosen side, the result of the symmetry is a mirror surface.
- When the symmetry plane cuts the faces
diagonally, triangles may be created and the result may not be
consistent. Click No Faces cutting Symmetry Plane
to generate a better result. A slider appears to manage the weight of
the edges located on the symmetry plane.
Converting a Symmetry into Subdivision Surface
|
|
You can also access this command by pressing ALT+SHIFT+C. |
-
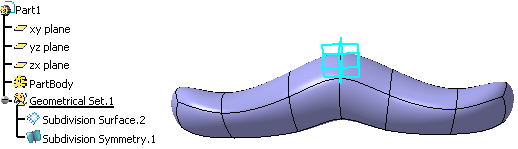
Specification tree as seen with symmetry created:
-
Using the Convert Into Subdivision command on Subdivision Symmetry.1, a new Subdivision Surface.3 is created:

- All the graphic properties and the material of the symmetry are kept for the new subdivision surface.
- The Convert Into Subdivision command works for multiple selection also.
- You can also create a subdivision surface feature as a result instead of a subdivision symmetry feature at the time of symmetry creation by selecting Subdivision Feature <icon> in the Tools Palette.
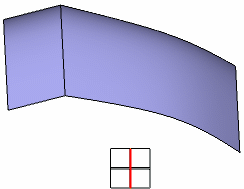
Create a sharp edge
![]()