Associating Elements

The task shows you how to associate a subdivision surface to a point, line, curve or another subdivision surface.
Open the Associating1.CATPart document.
  1. Click Link in the Operations toolbar.

    • You can also access this command by pressing ALT+SHIFT+L.

    • You can select the elements prior to entering the command.
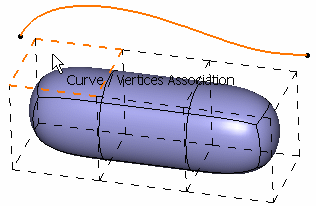
  2. Select the surface.

  3. In the Tools Palette, select any one from the following:
    Curve Selection Adds a new curve to the selection 
    All Association Removal Resets all the curve associations 
     Auto Association Points/Vertices Creates points associated to the selected vertices in a new geometrical set. 
     
    • You can multi-select the vertices to create multiple points.
    • After selecting the vertices, a new geometrical set is created each time you click Apply .
  4. Select a geometric feature (point, line, curve) or another subdivision surface.

  5. In the Tools Palette, select any one from the following:

    Association Removal Resets the current curve association.
    Auto Selection Selects any kind of element (faces, edges and vertices).
    Face Selection Selects faces only.
    Edge Selection Selects edges only.
    Vertex Selection  Selects vertices only.
    All Element Selection  Selects all elements.  
    For more information, see Selecting Elements.
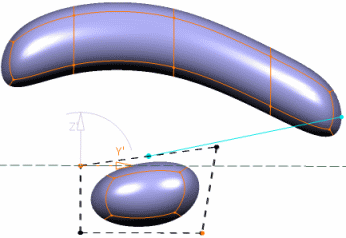
  6. Select the elements of the base mesh to associate to the surface: a blue dotted line (that is the vector) is displayed in the 3D area to show the association.
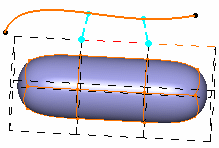
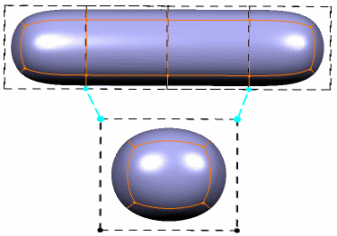
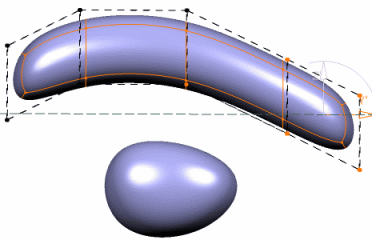
    The association is made using the closest points to the base mesh.

    Surface/Point Association

    Select a 3D point so that the selected elements of the base mesh are linked to the point.
    If you move the point, the surface is moved accordingly:

    Surface/Curve Association

    Surface/Surface Association

    If you deform the reference surface, the target surface is moved accordingly:
    In this case, the vector between the two vertices is re-applied but the linked vertices are still the same.
    You can also deform the associated subdivision surface. The linked vertices are free and can be modified:
     

    Display in Specification Tree

    When two elements are linked using the Link command, their display in the specification tree changes.
    • The following icons appear on the respective nodes in the specification tree:
      is displayed on the linked element. When you hover over such an element, a tooltip appears showing the element by which it is handled.
    • The tooltip is displayed when you hover over the elements that is limited to one parent-child relationship.
      Styling Curve.1 manipulates Subdivision Surface.2. Any modification done on the curve will be reflected on the surface also.
      Subdivision Surface.1 is manipulated by Styling Curve.1. Any modification done on the curve will be reflected on the surface also.
      Subdivision Surface.2 is manipulated by Styling Curve.1. Further Subdivision Surface.2 manipulates Subdivision Surface.1.

      In case you want to see all the relationship existing between features use the Parents/Children... contextual menu command.

    • When Link command is used:
      • A curve can handle a subdivision surface.
      • A subdivision surface can handle another subdivision surface.
      • A symmetry feature cannot be associated, but the parent element can be associated.
  7. Click Modification to deform the curve.

    A Tools Palette appears.
    For more information, see Manipulating and Deforming Curves.
  8. Sketch the curve to deform it.

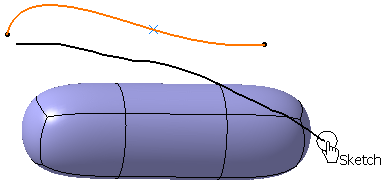
    The selected elements are automatically moved and the surface recomputed.
 
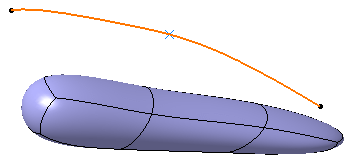
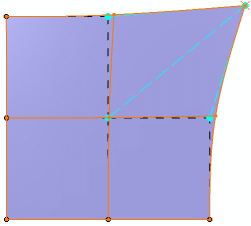
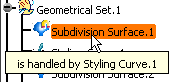
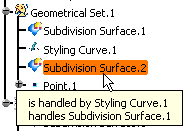
  When editing or modifying the subdivision surface, the link appears as a blue full line:
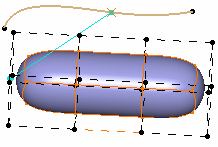