-
Click on the Isometric View icon
 in the Quick view
toolbar.
in the Quick view
toolbar. -
Click the Flange icon
 in the Surface Creation toolbar.
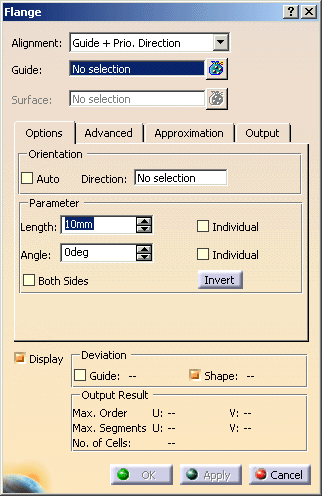
The Flange dialog box is displayed.
-
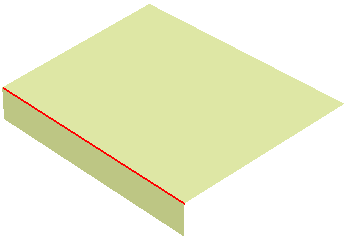
Select one edge of the created surface.
-
Press F8 for the next selection step or click onto the field Surface to activate the selection of the surface whose normal shall specify the flange direction.
-
Click anywhere onto the surface and press OK. The flange surface (identified as Flange.xxx) is created and added to the specification tree.
-
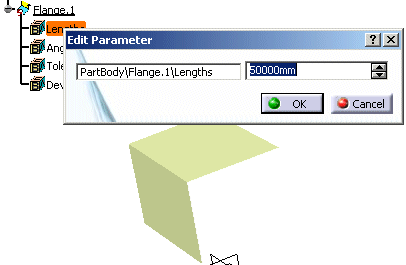
In the specification tree, double-click on Length, change in the dialog box the length value to 50 and press OK.
![]()