Generating 2D Pressure Symbols
|
|
This task shows you how to generate pressure symbols when an offset section view or a break out view cuts a cross section of an HVAC duct. | |
|
|
You need a Generative View Style
(GVS) file to generate 2D pressure symbols in your 2D drawing. You can
also modify your existing GVS file. Ensure that the View Specific
Symbols flag is set to Yes.
<std:node name="View Specific Symbols"> Select Tools > Options > Mechanical Design > Drafting. In the Administration tab, clear the Prevent generative view style usage option. This activates the GVS functionalities. |
|
|
|
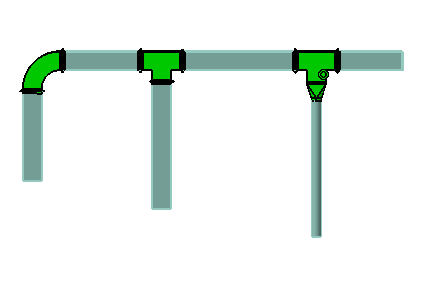
1. | Open the 3D document containing the HVAC duct. In the example below, the document contains an HVAC duct, which has elbow and Tees placed on it. |
 |
||
| 2. | Open a new Drawing. Click
Front View
|
|
| 3. | In the Generative View Style dialog box, select the XML file containing the settings for the HVAC pressure symbols. | |
| 4. | Select a plane by clicking the flat surface of a part, or by selecting a plane in the specification tree. | |
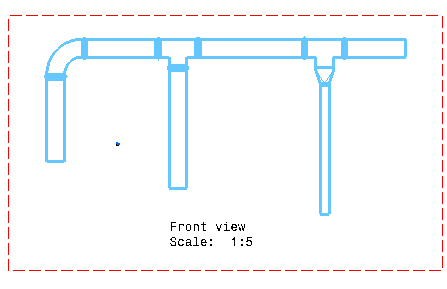
| 5. | Click anywhere in the drawing to generate the front view. For more information, see Generative Drafting : View Creation : Creating a Front View. | |
 |
||
| 6. | In the drawing window, click
Offset Section View
|
|
| 7. | Define a profile by creating one or several lines across the view. | |
| 9. | Click in the drawing to generate the section view. | |
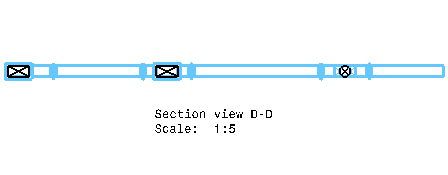
| 10. | The section view is
generated. The pressure symbols are indicated in the drawing. In the
example below, the 2D drawing shows the positive pressure symbols on the HVAC
ducts. Note: Right-click and select Hide/Show to hide the pattern of the duct's cross-section. |
|
 |
||
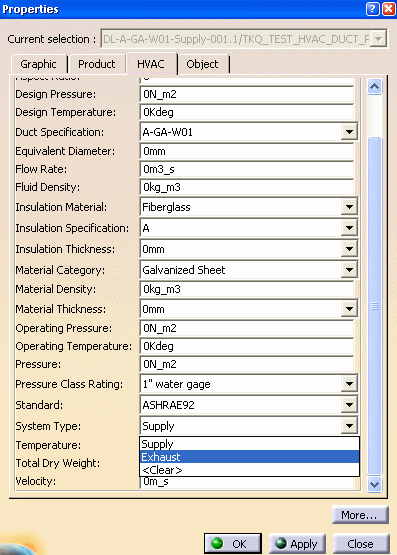
| 11. | In the 3D document, right-click the line object in the specification tree and select Properties. | |
| 12. | In the HVAC tab, Select Exhaust from the System Type list. Supply corresponds to positive pressure and Exhaust corresponds to negative pressure. If you select Clear, pressure symbols will not appear. | |
 |
||
| 13. | Click Update in the 2D document. The symbols are updated to indicate negative pressure. | |
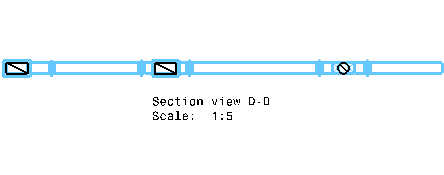 |
||
|
|
Limitations
|
|
![]()