-
Double-click Grid.3 in the specification tree.
The Grid definition dialog box is displayed.
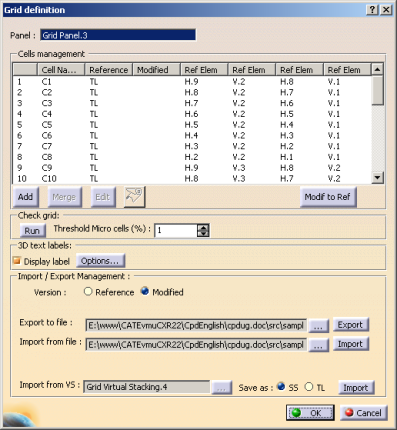
Import ModifiedStressData.xls from the samples directory.
The dialog box is updated:
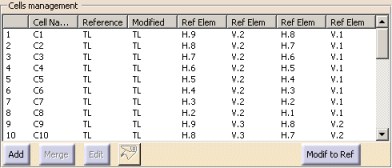
You can see the thickness has been modified.
Click OK to exit the dialog box. -
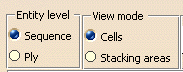
Double-click Grid Virtual Stacking.4.
Select the following options:
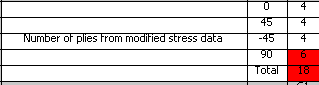
Select Display Info Table. The information table is displayed:
Cells in red indicate missing plies, cells in yellow indicate redundant plies.

For example, C1 cells with direction 0 are missing. Go back to the main dialog box viewer,
double-click the empty C1 cells in rows (Sequence.16 and Sequence.21) with 0 direction.
This valuates the direction of those cells to 0.
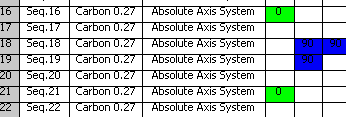
Go back to the information table: the cell has turned white, the number of plies is correct:
Proceed as explained above for all the red cells. Click Options

and select Thickness law
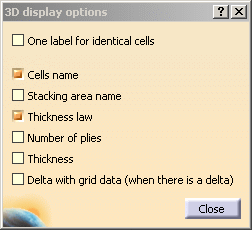
Click OK in the 3D display options dialog box and in the main dialog box.
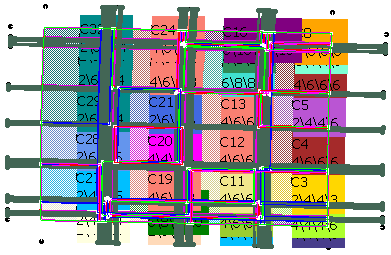
You can now inspect your model in the 3D viewer.
-
Click Synchronize stacking
 in the Grid Design toolbar and select Grid Virtual Stacking.4.
The Synchronize stacking dialog box is displayed and populated.
The last column gives you the status of each ply.

Click OK to synchronize the plies that need to.
The initial plies were

they are now
![]()