The following opening types can be prepared:
- Cut
- Tabbed
- Bridged
- Marked
- Drilled
- None (if no particular opening type is required)
-
Select the IMC Operation
 command.
 -
Select TBhd_1130_1 in the ProductList of the PPR tree.
The Initial Marking and Cutting Operation dialog box appears.
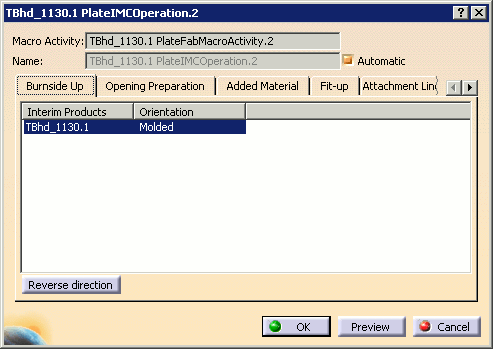
The plate is previewed in the geometry area and an arrow identifies the BSU direction.
-
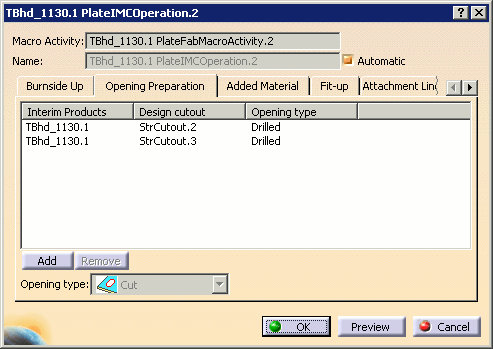
Click the Opening Preparation tab in the dialog box.
-
Click Add to access the list of all design cutouts in the plate.
The Add Items dialog box appears.
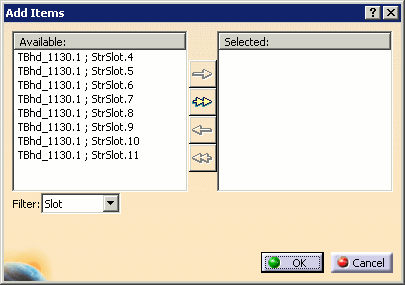

Use the Filter list to sort items displayed in the Available list. You can display cutouts only, slots only or both cutouts and slots. -
Use the arrows in this dialog box to select one or more design cutouts and move them to the Selected box, then click OK.
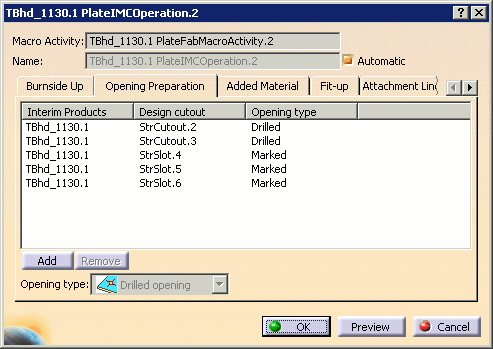
Selected cutouts are displayed in the Opening Preparation tab. All round design cutouts are listed as being of type drilled, and all other cutouts as well as any slots as being of type marked.
-
Select one row.
The opening preparation is highlighted in the geometry area: 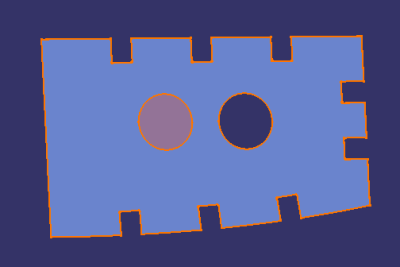
- To delete opening preparations from the list, simply select them and click Remove.
- Note that multi-selection is not available for opening preparation.
-
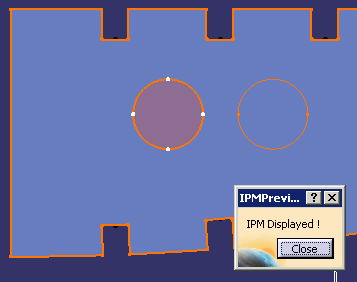
Click Preview. The IPM Preview dialog box is displayed, and a full preview of the IPM part with the selected opening preparation is shown:
-
Click Close in the IPM Preview dialog box to return to the IMC Operation dialog box.
-
Click OK when editing of the joining operation is complete, or click Cancel to cancel any changes that were made and dismiss the dialog box.
Opening Types
The Opening type list contains the preparation types that the user can manufacture. Available types include Cut, Tabbed, Bridged, Marked, Drilled and None.
To change a specific cutout's type from the default, select it and then select the desired opening type from the Opening type list.
The Cut type is provided to specify that the selected opening is not to be prepared. Therefore, when Cut is selected for a given opening, no manufacturing feature is created and the opening is no longer shown in the Opening Preparation dialog box. If it is determined that the selected opening requires preparation at a later date, the Add button can be used to retrieve it (as shown in Step 4 above).
For tabbed and bridged openings, additional parameters are provided in the dialog box.
For Tabbed openings, additional parameters are provided to specify:
-
Tab Width (you can see the width change in the 3D viewer as you alter the values in the dialog box)
-
Lead in Length/Lead Out Length: If the length of lead is set to zero, then the burning machine begins its movement from specific point that lies on the contour.
-
Lead Side (you can specify right or left)
-
the Min. number of tab points
-
the Max. distance between tab points.

For Bridged openings, a Width parameter is provided to input the width of the bridge. The Direction parameter specifies the direction in which the bridge should be made.

Opening type examples
Cut:
 |
Tabbed opening:
 |
Bridged opening:
 |
Marked opening:
 |
Drilled opening:
 |
None:
 |
![]()