This task lets you browse through and edit a joining operation's weld items, attachment lines and alignment marks that were generated automatically according to your settings (see the Customizing section).
-
Click Joining Operation
 .
. -
Select Deck01_1 in the ProductList.
The Joining Operation dialog box appears.

Managing Weld Information
-
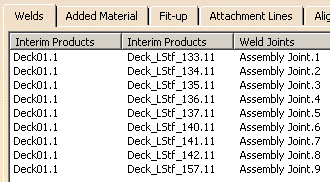
By default, the Joining Operation dialog box initially shows the Welds tab.

During the operation build, the system automatically detects and retrieves all weld joints created during the detail design phase for each joining operation and generates associated weld items. One weld item per weld joint is created. Weld items are visualized in light blue in the geometry area. 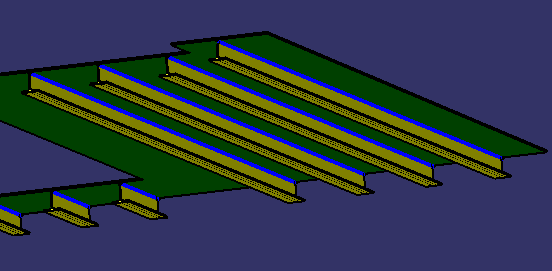
-
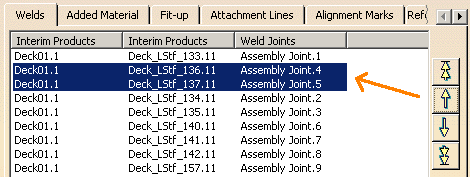
Select one or more pairs of interim products in the list and use the arrows in the dialog box to change the order in which products are welded. Multiple rows can be selected by holding the Ctrl key down when making the selections. In this example, two interim products have been selected and moved up two places via the up arrow button:
Interim products are highlighted in the geometry area when they are selected: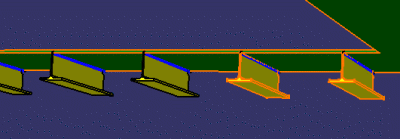
Adding Welds
If the Generate weld items option is not enabled in the current Tools > Options settings, weld items are not created automatically when the Build Activity List command is run and the Welds tab will initially be empty. In this scenario, welds can be added with the Add command.
Click Add.
The Add Items dialog box appears.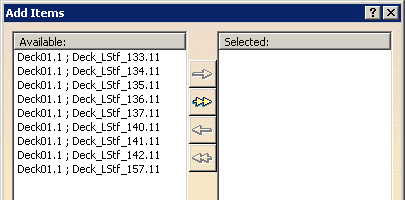
Select the desired interim products listed in the Available: column and click the right arrow button
 to move the selected items into the Selected: column. Note that the double right arrow button
may also be used to move all of the
products in the Available: column to the Selected: column.
to move the selected items into the Selected: column. Note that the double right arrow button
may also be used to move all of the
products in the Available: column to the Selected: column.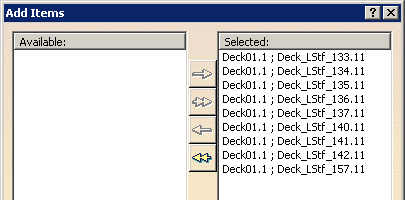
The left arrow button
 can be used to move selected items from the Selected: column back to the
Available: column, while the double left arrow will move all items to
the Available: column.
can be used to move selected items from the Selected: column back to the
Available: column, while the double left arrow will move all items to
the Available: column.Click OK. The selected interim products now appear in the Welds tab.
-
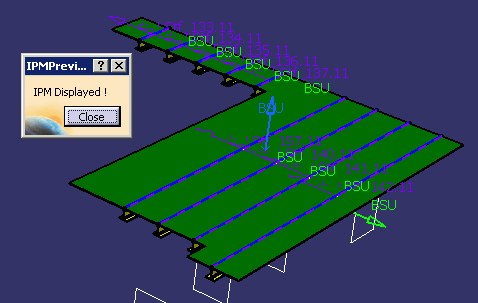
Click Preview. The IPM Preview dialog box is displayed, and a full preview of the IPM part with the defined weld items is shown:
-
Click Close in the IPM Preview dialog box to return to the Joining Operation dialog box.
Creating Welds Manually
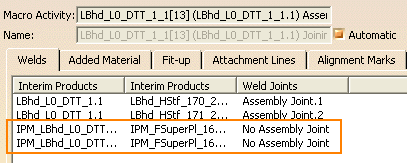
Weld joints can be created manually between piece parts when joint information is not present. There are two plates that have been inserted into the product. However the joint information for those plates is not present under the assembly joint node of the product.
-
Click on the one of the inserted plates, then click on the longitudinal bulk head.
A weld joint is formed and highlighted as a blue line, as shown above.
The new weld joint can also be seen on the Welds tab page: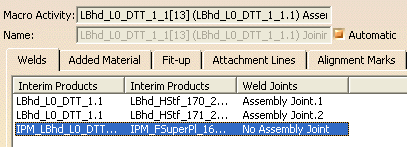
-
Repeat Step 3 for the other plate to create a weld joint for it as well.
-
Switch to the Attachment line tab. Attachment lines are also created when weld joints are defined if the Generate attachment and alignment line items option is on in Tools > Options.
If this option is not on, the Add button can be used to create attachment lines.
Attachment Lines
-
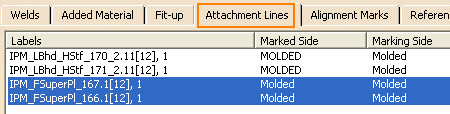
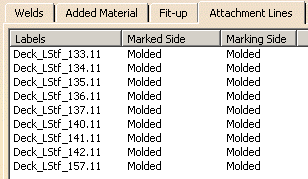
Select the Attachment Lines tab.
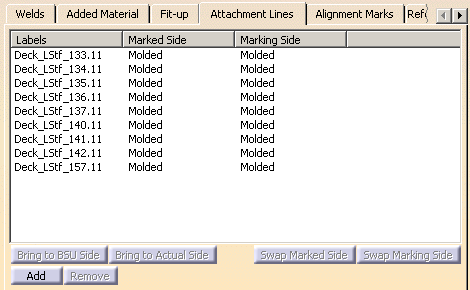
Based on T-weld joints defined during the detail design phase, the system automatically retrieves and lists piece parts that require attachment lines and alignment marks. - To delete lines from the list, simply select them and click Remove.
- To change the label, click the appropriate cell and enter your own label. By default, labels are object identifiers.
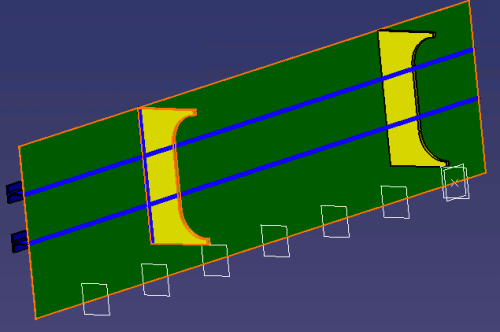
Attachment lines and alignment marks are visualized in the geometry area: 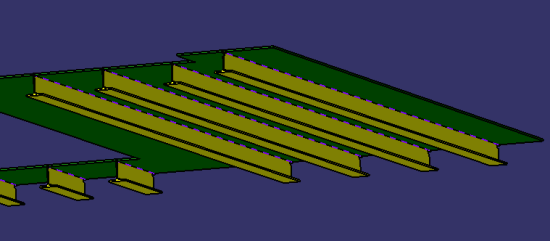
Note: Irrespective of the marking side specification, the attachment line and alignment mark are always previewed on the molded side.
-
Select one or more rows in the dialog box and:
-
Click Swap Marked Side to change the side of plate (thick or molded) on which the attachment line will be placed.
-
Click Swap Marking Side to change the side of profile on the plate on which the attachment line will be marked.
-
Click Bring to BSU Side to set the attachment line on the BSU direction of the plate.
-
Click Bring to Actual Side to set the attachment line on the actual side of the plate.
The Marked Side setting determines which side of the plate the attachment line is placed, while the Marking Side setting determines which side of the profile the attachment line is placed. This behavior is illustrated by the following examples.
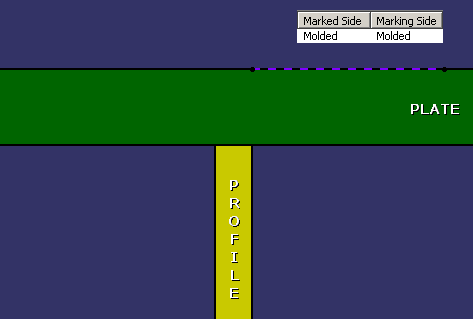
Marked Side: Molded, Marking Side: Molded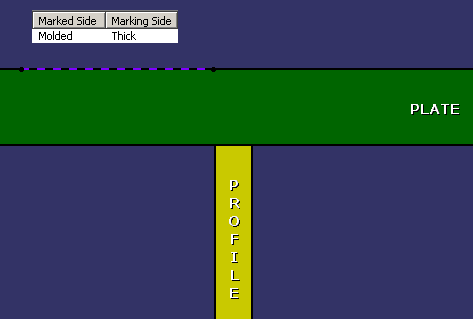
Marked Side: Molded, Marking Side: Thick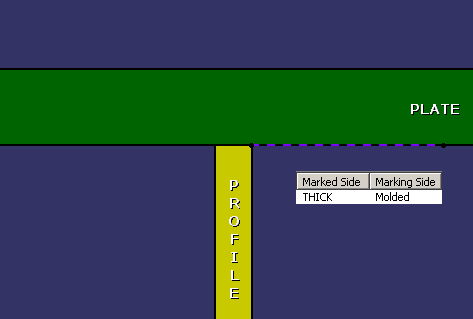
Marked Side: Thick, Marking Side: Molded
Marked Side: Thick, Marking Side: ThickBy default, the attachment line is placed on the molded side.
-
Adding Attachment Lines
If the Generate attachment and alignment line items option is not enabled in the current Tools > Options settings, attachment line items are not created automatically when the Build Activity List command is run and the Attachment Lines tab will initially be empty. In this scenario, attachment lines can be added with the Add command.
Click Add.
The Add Items dialog box appears.Select the desired interim products listed in the Available: column and click the right arrow button
to move the selected items into the Selected: column. Note that the double right arrow button
may also be used to move all of the
products in the Available: column to the Selected: column.The left arrow button
can be used to move selected items from the Selected: column back to the
Available: column, while the double left arrow will move all items to
the Available: column.Click OK. The selected interim products now appear in the Welds tab.
Alignment Marks
-
Select the Alignment Marks tab.

-
Using the Location box, select where you want the alignment mark applied.
Alignment marks can be applied to both ends, one end or no end of the marked part. The following image shows alignment marks offset from both ends of the selected part: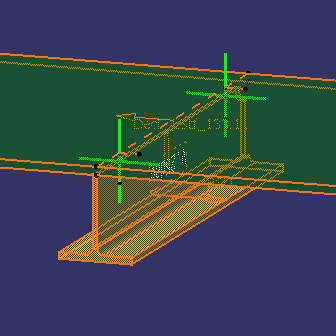
-
Click the Offset cell and change the value to set the distance from the end of the attachment line at which alignment marks are located.
Note: You can set default location and offset values in Tools > Options > Digital Process for Manufacturing > DPM - Structure Lofting or DPM - Structure Manufacturing Preparation > Features.
Initially, the location is set to Start and the offset is set to 0mm. -
Repeat for other rows.
-
Click OK when editing of the joining operation is complete, or click Cancel to cancel any changes that were made and dismiss the dialog box.
Offset distance is measured along the intersecting element from the edge of the plate for alignment mark creation , and is not the perpendicular distance from the edge.
You can select a length for the alignment mark (the length selected appears in the Length column) for all types of alignment marks,
Because there is no pre-defined Start or End to the intersecting element, the software internally calculates Start and End based on positioning of the intersection element. A light visualization is provided to indicate Start and End of intersecting element (as calculated internally by the software) while modifying the extremity of the alignment item in IMC/Joining operations.
As there are two alignments (one each on both plates) corresponding to one butt joint, and should be in synchronization with each other with respect the extremity and offset, both these alignments items are made interdependent i.e., changing extremity of one of these alignments will automatically change the other alignment item as well. This automation of interdependence minimizes the manual interaction and makes it usable. However, this interdependence is only for these butt-butt alignment items and not for Tee-joint alignment items.