First, you will define a punch in Part Design, in the absolute axis
system.
Then, in a Sheet Metal part, you will bring the punch feature (and its axis
system) to a point you have selected. If necessary, you will define a
rotation of the axis system from a reference line.
This user-defined stamping cannot be combined with the Punch with a Die approach.
Creating Stamps
![]()
-
Start the Part Design application.
-
Insert a PartBody (menu Insert > Body) to define the punch.
-
Enter the Sketcher workbench
 ,
select the yz plane, and draw the profile of the punch.
 -
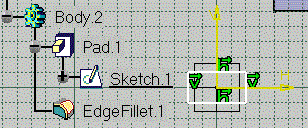
Return to the 3D space and create the punch using the pad icon
 and the fillet icon
 .
.
The punch must be oriented as described in Defining the Punch in Relation to the base feature to be Stamped in the Creating User-Defined Stamping Features chapter. 
The punch can be defined in the Sheet Metal part where the stamping is to be created or in another part.
In this case, when selecting the punch feature, the system automatically copies it into the .CATPart document into which the base feature to be stamped is located.
A link is retained between the initial punch feature and its copy.
-
Return to the Sheet Metal application, and if needed, use the Define In Work Object on the PartBody containing the base feature to be stamped.
-
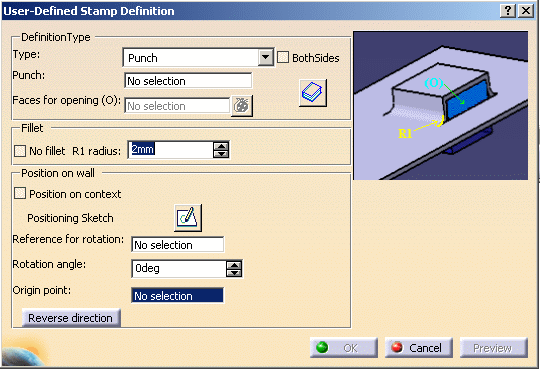
Click User Stamp
 in the Cutting/Stamping toolbar (Stamping
sub-toolbar). The User-Defined Stamp Definition dialog box is
displayed.
-
Select a base feature where the stamping is to be created.
This base feature is used to define the stamping location and direction, by matching the punch's origin to the selected point on the base feature.
-
In the Type list, keep the default Punch mode.

-
Select the BothSides check box to stamp in two opposite directions of the stamping face in a single operation.
-
If you select the BothSides check box, the selected feature (punch or die) will not be split by the stamping face. In this case, the faces selected in the Faces for opening box is used to determine the portion of the selected feature to be removed.
-
-
Click the Punch field and select Body.2 as the punch. The punch is previewed on the base feature.
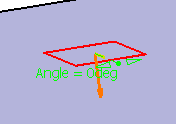
-
Click the Faces for opening field and select the lateral faces of the punch (Pad.1).


The  icon to the right of the Faces for opening field lets you
edit the list of opening faces.
 -
Click Preview. The stamp is previewed with the opening faces:
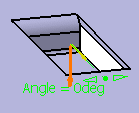
-
Select the Position on Context check box if you want to position the stamp according to the positioning and direction of the punch and die features.
-
Click Preview. The stamp is previewed with the opening faces at the point where the punch and die were created on the part:
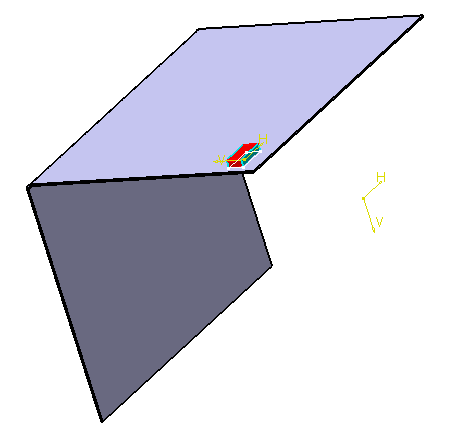

For more information about the Position on context check box, refer to the Creating a Punch with a Die section. -
Select the No fillet check box if you do not want the stamp to be filleted, or set the radius value if you want the stamp to be filleted.
-
If needed, define the stamp's positioning on the selected base feature by choosing:
-
a Reference for rotation: by default, it is the sketch axis, but you can also select any line or edge on the base feature.
-
a Rotation angle value: you can either enter a value in the dialog box, or use the manipulator in the geometry to define this value.
-
a new Origin point on the base feature to coincide with the punch's point of origin.
This is especially useful for non-circular stamps, but you can very well create the stamp as is, without further positioning.

To edit the sketch having origin point, click Positioning Sketch
 .
This option can be used only after selection of the origin point.
 -
-
Click OK to validate and create the stamping.
The punch is automatically set in No Show mode. 
- Radius is the radius of the bend between the stamping and the base feature.
- Punch is the body you have defined previously. If the punch is in another .CATPart document, activate this document before clicking the punch.
- The Faces for opening must be picked on the punch,
not on the base feature.
If the punch is located into another .CATPart document, these faces must be picked on the copy of the punch where the base feature to be stamped is located. - If you modify the selected punch, the user-defined stamp with the opening faces will not be updated accordingly, nor will it be updateable. If you want to update the user-defined stamp, you will need to edit it; in the User Defined Stamp Definition dialog box, clear the Faces for opening field and re-select the lateral faces of the modified punch.
- Avoid using stamps with faces merging with the face of the base
feature to be stamped, as it would be difficult to remove
afterwards, especially on a curved part.
If you do use such a stamp, select the stamp face tangent to the base feature and define it as an open face. - If you select two reference lines in addition to the plane,
this will create two editable constraints to position the stamping.
These constraints are editable.

- A user-defined stamping can be edited (punch, die, position, constraints).
- Check the No fillet option to deactivate the Radius R1 value, and to create the stamp without a fillet.
Inserting Punch with Opening Faces Feature from the Catalog
The CATPart and the catalog are available from the sample directory (Punch_Open.CATPart, UserStamp_Catalog.catalog).
-
Click User Stamp
 .
The User-Defined Stamp Definition dialog box is
displayed.
-
Select the face of the part where the stamping is to be created.
-
Click in the Punch box.
-
Click catalog
 to select a Punch feature
from the catalog.
to select a Punch feature
from the catalog.The Catalog Browser dialog box is displayed.
-
Browse to the directory where UserStamp_Catalog.catalog is filed.
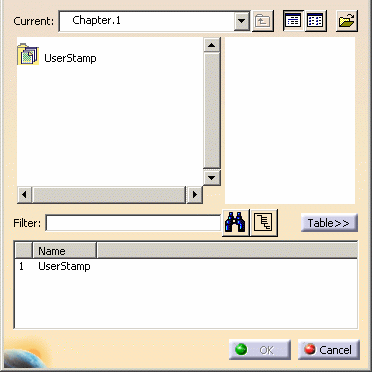
-
Double click on chapter UserStamp.

The parts saved in the catalog are displayed. -
Select the Punch_Open part, then click OK.
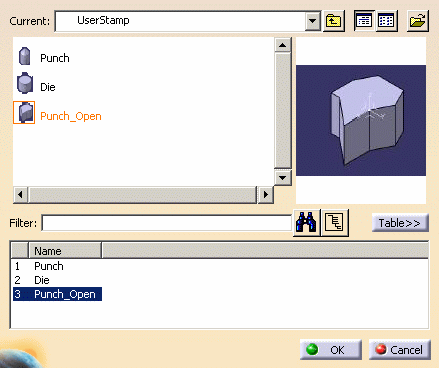
The body of this punch is aggregated under the part in the specification tree. 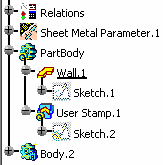
-
Select the Faces for opening field to activate it.
-
Select a face of the punch.

-
Click on OK to create the stamp.
![]()
