|
-
Select the Fill Holes icon
 and Cloud Import.1.
-
The dialog box is displayed.
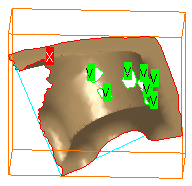
A first recognition of the holes is done:
-
X means the hole is not selected.
-
V means the hole is selected.
-
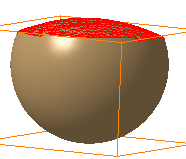
The biggest hole found is considered as "exterior".
Since you usually do not want to fill the outside of the part, this
hole is not selected, but you can change its status.
|
-
Click the label to select or de-select a
given hole or right-click a label to call the contextual menu:
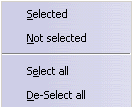
Use Selected/Not selected
as a toggle on a single hole, and Select all/De-Select
all as a toggle on all holes.
-
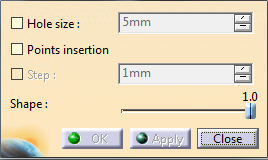
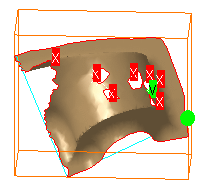
To automatically select the holes to fill, select the Hole
size check box and enter a value.
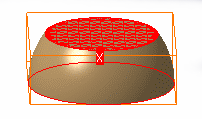
A sphere is displayed.
| All the holes smaller than this sphere are selected. |
 |
-
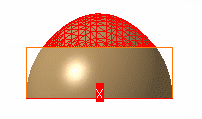
Click Apply. A basic meshing is
computed to fill the hole.
  
-
Close the dialog box and repeat this step
with the Points
insertion check box selected and click Apply.
A new meshing is computed, with more meshing points:

-
When Points insertion is selected, the
Step check box and the Shape slider become available.
-
Click Apply to visualize the
filling with given parameters.
If you are not satisfied, click Undo, modify the parameters and click
Apply to refresh the filling.
Once you are satisfied, click
OK to validate and exit the
action.
|