![]()
Group Button Config Example
Operation@"Robot Language" = <value assigned>
The V5 entity shown above results in the creation of an empty operation with the attribute "Robot Language" and the value set depending upon which button is selected. The second process is exactly the opposite of the first. V5 entities are sent to the CCF interpreter from the PPR tree and CCF matches these entities to the entities associated with each button to determine which button (if any) is appropriate for generation of NRL syntax.
-
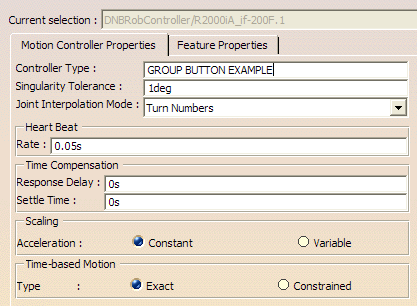
To get the GROUP_BUTTON_EXAMPLE.config file to display in NRL teach, retrieve any robot from Robotlib. Right click on the controller and select properties. Change the Controller Type name to GROUP_BUTTON_EXAMPLE as shown in the following illustration.
-
Copy the Group_Button_Example CCF into the NRL Teach directory specified in the Offline Programming tab under Tools > Options > Resrouce Detailing.
-
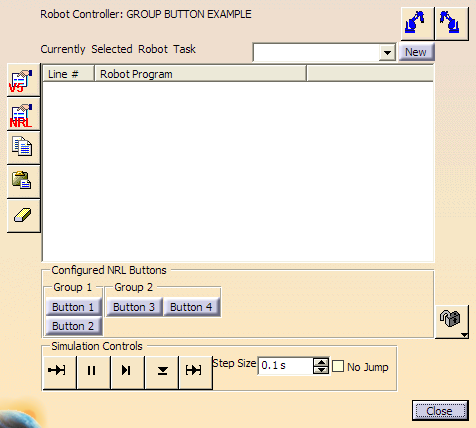
Select Native Robot Language Teach
 and select the robot.
The NRL teach dialog box appears.
and select the robot.
The NRL teach dialog box appears.
-
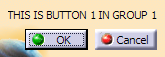
Select each button to display the Button Dialog associated with the button. An example is:
-
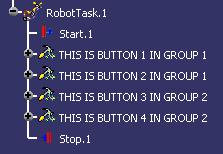
Click OK for each button. The result is an NRL Teach dialog with scripted button commands as shown below:
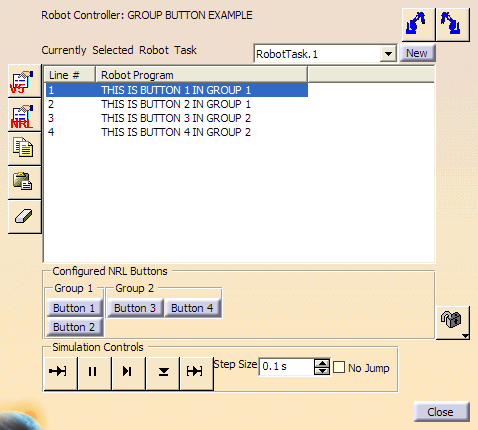
The PPR tree is also updated as shown:

Note that if the updated task is saved, you will not be able to revert back to the initial state of the task prior to using NRL Teach. -
Close the NRL Teach dialog box.
-
Click
and reopen the NRL Teach dialog. Select RobotTask.1 from the PPR Tree. The NRL Teach dialog generates the correct scripted statements.

The important things to understand about this example are: - Group/Button definitions/locations.
- Use of a V5 entity assignment to distinguish similar buttons.
V5 Entity Mapping and Button Match Example
This example involves some more complex buttons with variable and enumeration definitions and V5 entity mappings. The V5 entities used for both buttons include:
|
DNBRobotMotionActivity.MotionType to joint for MoveJ and to linear for MoveL. It is critical when setting up buttons in CCF to make sure each button has a unique set of V5 entities and/or V5 entity values. If not, the first button found will be used, which in this case could result in MoveJ being displayed for all DNBRobotMotionActivity.
-
Load the attached button_match_example CCF file using the same method described above for the Group Button configuration example. The dialog when opening NRL Teach should be as shown:
-
Click the MoveJ button and use the default values of:
MoveJ robtarget 1, v500, fine, tool 1 \ wobj:=wobj 1Click OK.
-
The Motion Options dialog box appears. This dialog is a result of the USE_MOTION_OPTIONS function that is included in the button definition. Use the default settings but create a new tag group named test.
-
Click Record and the MoveJ statement will appear in the NRL Teach dialog and in the PPR Tree. Create two MoveL statements using the same method and finish with a MoveJ statement.
In addition, motion and accuracy profiles are created and will be shown in the PPR Tree. Tool and objectframe profiles can also be created by adding two buttons which contain the CREATE_TOOL_PROFILE and CREATE_OBJECTFRAME_PROFILE functions. -
Close the NRL Teach dialog and reopen it selecting RobotTask.1 that was created earlier. The NRL Teach dialog should generate the correct scripted statements.
The important things to understand about this example are: - When selecting a task for NRL display, the button configuration chosen is based on the number of matching V5 entities. If two buttons have the same number of mapped entities then a V5 entity assignment must be used to determine which button to use.
- The number of V5 entities is determined by counting the number of VARIABLE and ENUM mapped entities that match and adding to that the number of assignments that match.
- All motion statement buttons must have a
USE_MOTION_OPTIONS function to
generate the motion options dialog for jogging the robot and recording the position. - Profiles automatically generated for DNBRobotMotionActivity commands.