- a robot with a predefined tool profile
- a tag group generated at the robot's mounting plate while moving the tool tip to a fixed point in space at different orientations of the robot's wrist.
- an initial guess for the tool point parameters. The guess should be within a few centimeters of the actual tool parameters.
For more information on the algorithm used for tool information, see About Tool Point Calibration.
![]()
-
Click Calibrate Tool Point
 .
. -
Select the robot whose tool point you wish to adjust.
-
Select the tag group that represents the simulation points used to compute the true TCP. (Typically, this tag group is uploaded.)
-
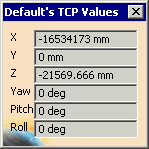
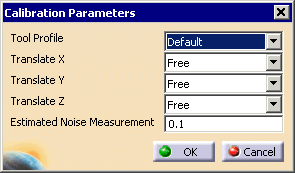
Two dialog boxes appear:
-
Alter the tool point parameters as desired:
- Select the desired tool profile (the default value is Default)
- Translate X, Y, Z (i.e., set as Free/Fixed): Specifies which components of the tool frame are to be adjusted. Unless the resource is known to be aligned with an axis or on a plane, the [X, Y, Z] parameters should all be set "Free" during calibration.
- Estimated measurement noise: an estimate of the uncertainty of the positional measurements during the calibration experiment. The measurement noise need only be an order of magnitude estimate, for example 0.1 mm or 1.0 mm.
-
Click OK.
-
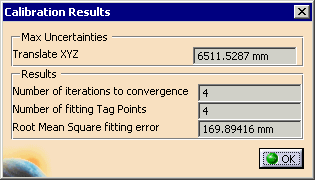
The tool point Calibration Results dialog box appears.

-
The table below describes the values provided:
-
Click OK when completed.
| Value | Explanation |
| Maximum uncertainties | This value represents the maximum of the uncertainties for the fit on the parameters to be identified. Large uncertainty values are an indication that the experimental observation strategy was flawed, even if the RMS fitting error was small. |
| Number of iterations to convergence | The number of iterations required by the numerical identification method. |
| Number of fitting tag points | The number of points used for the least squares fitting procedure. |
| Root mean square fitting error | The root mean square fitting error on the points after adjusting the tool profile to the best fit possible. |
![]() The
robot's tool profile is adjusted in an attempt to get the tool tip to move
to the same point in space from each of the different wrist orientations.
The algorithm works by minimizing the mean square position error between
the tool tip positions from each of the mounting plate tag points while
maintaining the constraints of the Translate X, Y, Z selections.
The
robot's tool profile is adjusted in an attempt to get the tool tip to move
to the same point in space from each of the different wrist orientations.
The algorithm works by minimizing the mean square position error between
the tool tip positions from each of the mounting plate tag points while
maintaining the constraints of the Translate X, Y, Z selections.

