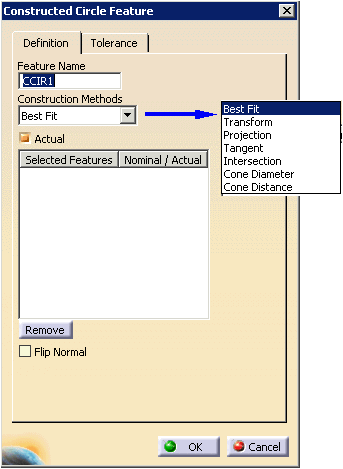
| Method |
Explanation |
| Best Fit |
Select at least 3 points. |
| Transform |
Signifies that the constructed feature is a
copy of the previously measured or constructed feature except
that the previously measured or constructed feature is
transformed to the specified coordinate system or to the
current coordinate system when no coordinate system has been
specified.
In an inspect context, the feature is just duplicated. To
put this feature in a different alignment, the user will have
to use the move after command and position the feature after
an Activate Alignment activity
Required for construction:
|
| Projection |
Signifies that the feature to be
constructed is to be the projection of a previously defined
and measured feature onto the specified feature.
Required for construction:
- Circle feature
- Plane reducible feature
|
| Tangent |
Select two circles or lines and a diameter.
The software then provides multiple solutions (visible on the
geometry when selected in the dialog) for construction. |
| Intersection |
Required for construction:
|
| Cone Diameter |
Signifies that the circle will be constructed
on the actual cone where the cone has a diameter of the value
specified by diameter. Required for construction:
|
| Cone Distance |
Signifies that the circle will
be constructed at a specified distance from the actual cone
vertex along the actual cone axis. Required for construction:
|