 |
This procedure describes how to measure a cone feature.
A cone feature measure will appear as an activity of the process on the
PPR tree. The top of the feature will always be measured first. |
 |
To measure a cone feature, you must have a product
loaded and a cone defined. |
 |
-
Select the parent process or preceding activity for
the measure cone activity.
-
On the Inspection Activities toolbar, click
Measure Cone . .
-
Select the defined cone you wish to measure.
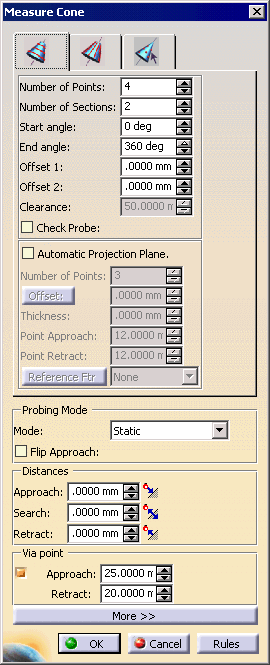
| The Measure Cone dialog box appears. Select
the first tab to measure the cylinder radially; the second to
measure it axially. |
 |
-
Alter the information in the dialog box as desired.
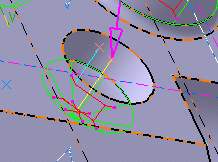
| A preview of the path appears as you alter the
data. |
 |
 |
In some cases, the probe cannot reach all of the
measurement points generated; it can only reach one arc of the
cone. In this case, select the Check Probe option
on the Measure Cone dialog box. This option generates the
measurement points only on the reachable arc of cone. The arc is
specified by the path parameters Start Angle and
End Angle, which are calculated by the option (as a result,
these options are disabled in the dialog box when Check Probe
is selected). The normal of the feature and the stylus
vector of the currently activated probe are used to automatically
compute the start angle and end angle of path and then generate
measurement points within this arc. |
| |
When measuring internal features, if the ratio of
diameter/length is greater than 2, you will be prompted with to
double check using collision detection tools. |
| |
Modifying the probe approach angles of a particular
probe automatically update all the measurement paths that use the
particular probe as the current probe. This means that start angle
and end angle parameters of path are recalculated for the modified
probe angle. |
| |
Move after, Reorder, and Delete Activity commands may
change the currently activated probe for measurement paths. Any of
these commands trigger an automatic update of the path to reflect
the new probe configuration for all features. |
| |
This feature only applies to Inspection Offline. |
-
Once you have defined the measurement desired, click
on the OK button.
| The activity is added to the PPR tree. |
|
 |
Note that creating a measure point activity also
creates a tag list resource (which consists of cone path groups) and
cone path applications. |
|
If you create this activity before you insert a CMM
into the resource list of the PPR tree, you will be asked to confirm
that you wish to create the activity without a CMM assigned to it.
You can assign the CMM to all the
activities within the process once you are ready to insert the CMM. |
| |
When an outer circle is being measured, goto points
will be added automatically to avoid a collision. |

