See Using a View/Annotation Plane for more information.
Open an existing 3D part.
-
Click View From Reference
 in
the
Views/Annotation
Planes toolbar (Views sub-toolbar).
in
the
Views/Annotation
Planes toolbar (Views sub-toolbar).
The Tools Palette toolbar appears. -
Select Axonometric View
 from the Tools Palette.
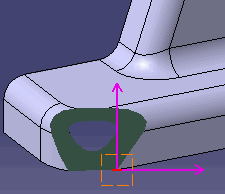
Blue borders are displayed at the four corners of the screen allowing you to define the view point.
You can set a 3D viewpoint and/or select a point to define the axonometric view. -
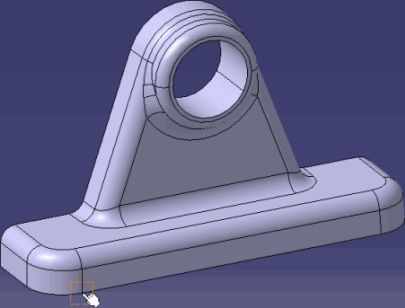
Select a 3D point or vertex, or indicate a point on a surface or a curve, in the 3D window to define the origin of the view and click anywhere.
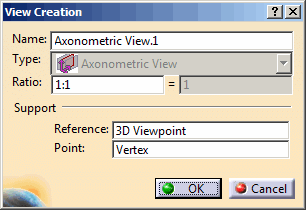
The View Creation dialog box appears.
-
Click OK in the View Creation dialog box.
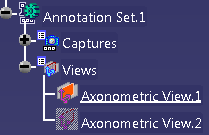
Clicking anywhere in the geometry area is equivalent to clicking OK in the dialog box associated with this command. The axonometric view is created. Axonometric views are represented by a magenta reference axis and are identified as Axonometric View in the specification tree.