![]()
To know more details, refer to Considering External Data Routing in Greater Depth.
- A geometrical bundle with bundle segments and components at their extremities
- A system.
![]()
-
Switch to Electrical Wire Routing workbench
 .
. -
Double-click to activate the root product.
-
Create the electrical bundle connected to the geometrical bundle.
To do so: -
Click New Bundle
 .
. -
Select the geometrical bundle to be connected to.
These steps are detailed in the Basic Tasks - Defining the Routing Context - Creating the Bundle.
The electrical bundle is added to the specification tree under the root product. -
-
The wire list opens with connectivity and attribute information: 
For the wires available in the list, you get the following information: - The wire name
- The wire reference designator
- The wire external diameter
- The wire bend radius
- Whether or not the wire is routed
- Whether or not wire extremities have been found, or changed.
Filters can help you make your selection:
- Hide already routed wires
- Hide not routed wires
- Hide wires whose extremities are not found.
The routing options allow you to use or not the knowledge rule.
-
Select one or more wires and click the right arrow.
The selected wires shift to the right column: they will be routed. -
Click Route.
The Automatic Wire Routing Report is displayed 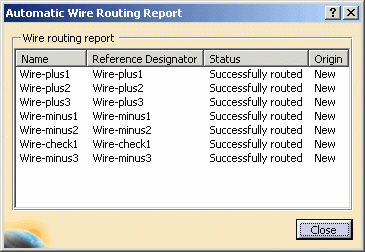
-
Close the report window.
The wires are added to the specification tree: 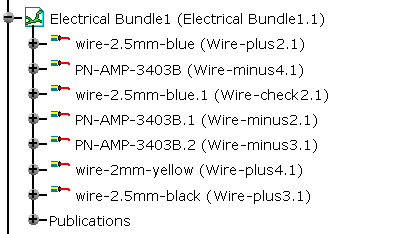
The bundle segments diameter are updated according to the wiring information.
To know more, refer to Customizing - Equipment & Systems - Electrical Wire Routing documentation.