![]()
-
Click Manage Links
 .
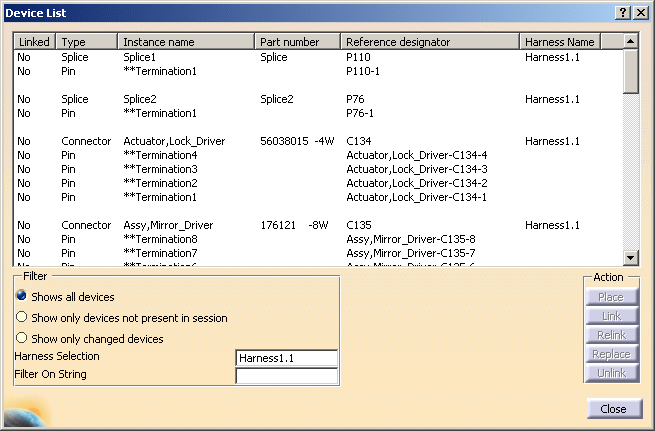
.The device list displays: 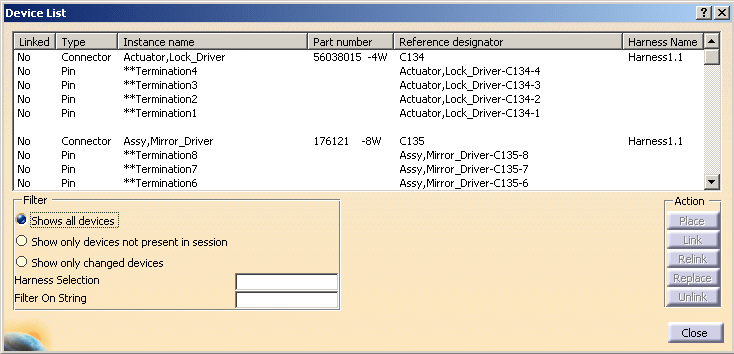
The components you can place are: - Equipment
- Connectors
- Internal splices
- Shells.
You can filter the list: - Show all devices: the list displays all the devices referenced in the external data file, even if they are not placed in the geometry.
- Show only devices not present in session: the list displays only the devices placed in the geometry.
- Show only changed devices: the list displays only the devices which part numbers have been changed in the external data file.
-
-
-
Select a component, for example the battery: Battery 6volts.1

If the component is not linked to a 3D element, the Place and Link buttons become available. -
Click Place.
The Catalog Browser opens. 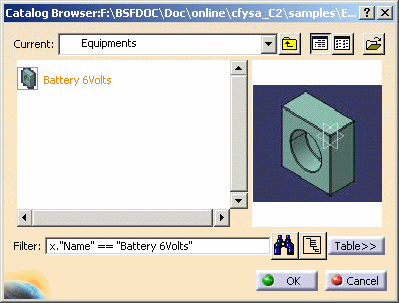

Since a mapping has been defined, the catalog browser has been filtered to display only the object with the same part number as the object selected in the device list.
If the part number is defined neither in the device list nor in the catalog, you can navigate in the catalog browser to select the component of your choice. -
Select this equipment: Battery 6volts and click OK.
The equipment is placed and automatically linked, together with the connector that belongs to it.
They are added to the specification tree under the active product and appear in the geometry at the origin. You can change their locations using the compass.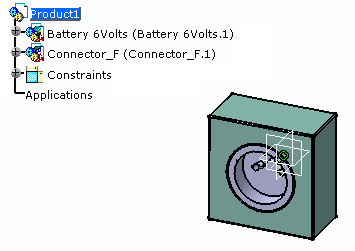
The component list is updated: the equipment, connector and pins are shown as linked in the device list. 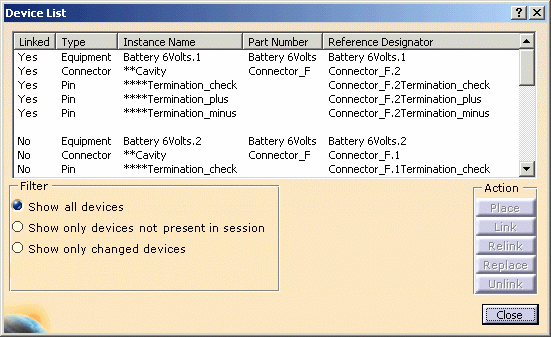
If all the sub-element part numbers are filled up in the device list and found in the catalog, they are automatically placed and linked. For a connector to be correctly placed in the right cavity of an item of equipment:
- The equipment and connector PartNumbers in the XML file must correspond to items in the V5 catalog.
- The equipment must have a cavity with a defined name in the V5 catalog.
- The connector name in the XML file must correspond to a cavity name of the V5 equipment.
For more information, refer to Managing Links from External Data (under Working with External Systems) in the Electrical Library User's Guide.
-
Repeat these steps for the second equipment: Battery 6Volts.2.
-
Click Close when you are done.

To do so:
- Use the Tools > Options... menu
- Then in the Equipment & Systems category, select the Electrical Mapping tab.
Refer to the Customizing - Equipment & Systems - Electrical mapping documentation.