-
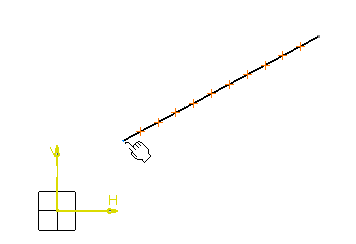
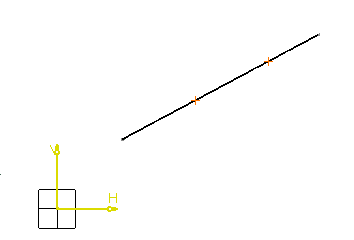
Select a line.

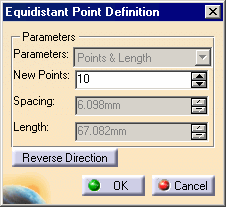
The Equidistant Points Definition dialog box appears. By default 10 equidistant points appear on the selected object.
- You can select a spline to create equidistant points on it.
- You can also select the two points to create equidistant points between them.
- You can click Reverse Direction to create the equidistant points in the opposite direction.
-
Optional: Change the value displayed in the New Points box to modify the number of equidistant points.
-
Select an extremity point as the starting point.
The Parameters list and Spacing box become editable. By default, the Points & Spacing option is displayed in the Parameters list. Perform any one of the following actions.
- Select Points & Length in the Parameters
list, Set New Points=2, and Set Length=60mm.
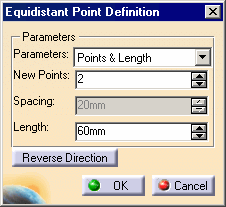
Two points are created and distributed along the selected length.

- Select Points & Spacing
in the Parameters list, Set New Points=2,
and Set Spacing=25mm.
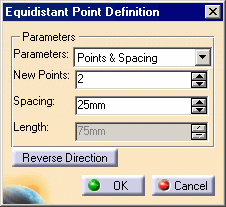
Two points are created and distributed along the line.
- Select Spacing & Length in the
Parameters list, Set Spacing=20mm, and Set
Length=90mm.
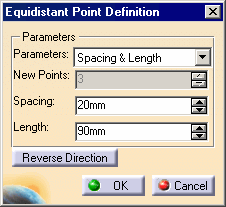
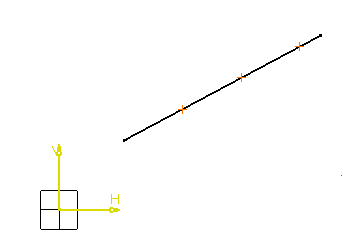
Three new points are created.
- Select Points & Length in the Parameters
list, Set New Points=2, and Set Length=60mm.
-
If you use the arrows to modify any value, the point distribution is automatically updated.
-
If you type a value in a field, you must press ENTER to update the point distribution.
-
The spacing value represents the distance between two consecutive new points.
-
The length value represents the distance between the starting point and the last new point created.
-
Click OK.
The points are created with their constraints and simultaneously the Relations node is displayed in the specification tree, wherein the equivalent dimension is created.

You can change this value and modify the distance of all the points simultaneously. -
Expand the Relations node in the specification tree and double-click EquivalentDimensions.x.
The Equivalent Dimensions Feature Window dialog box appears displaying all the formulae for equidistant points.
-
Constraints are assigned to these points and distributions if you activate the Dimensional Constraints option
 and the Geometrical Constraints option
 in the Sketch tools toolbar.
 -
You can create formulas. For more information about formulas, see Knowledge Advisor User's guide.
-
You can double-click a point and redefine either the Cartesian or the polar coordinates from the Point Definition dialog box to edit points individually.
-
Modifications applied to the supporting element are not applied to points. You can select Edit > Properties and customize the symbol used for points in the geometry area in the Graphic tab.
-
Equivalent Dimensions:
One equivalent dimension is created for all the distance/radius parameters between the points or radii respectively. You can alter this equivalent dimension value and change the value of all the distance or radius parameters simultaneously.
It is displayed in the Relations node in the specification tree and consists of all the parameters for distances/radii.