- Length dimensions
- Distance dimensions
- Radius dimensions
- Diameter dimensions
- Angle dimensions
-
Select the dimensions to be lined-up.

When selecting the dimensions, make sure that they belong to a single, coherent system (if you select dimensions which could form two different systems, you could get unexpected results).
Note that if none of the following conditions is satisfied, then the Line-Up command identifies more than one dimension systems out of the selected dimensions:
- At least one of the extremity points of a dimension
lies on the same side, as that of the corresponding
extremity point of the other dimensions.
However, note that, the identification of corresponding extremities of a dimension depends on the order of the selection of elements while creating the dimension. - The farthest extremity point of a dimension lies on the same side, as that of the farthest extremity point of the other dimensions.
- At least one of the extremity points of a dimension
lies on the same side, as that of the corresponding
extremity point of the other dimensions.
-
Right-click and select Line-up, or select Tools > Positioning > Line-up from the menu bar or
click Line-Up .
. -
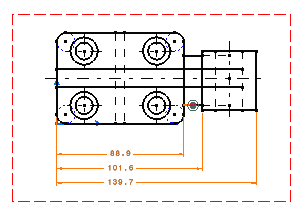
Select the element that will be used as reference for positioning dimensions, as show here:

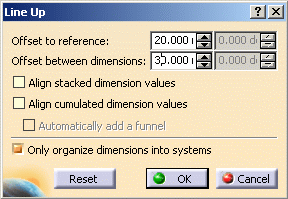
The Line Up dialog box appears.
-
Enter the desired value for the offset to reference. For example, 20 mm.
-
Enter the desired value for the offset between dimensions. For example, 30 mm.


Two fields are available for both these options: - The first field is dedicated to length, distance and angle dimensions. It is defined with the Paper Unit (defined in Tools > Options > Mechanical design > Drafting > General tab (See Customizing Section: General documentation).
- The second field (grayed out in our example) is dedicated to radius and diameter dimensions.
Whether a field is active depends on the type of dimension selected.
-
Optionally, select Align stacked dimension values to align all the values of a group of stacked dimensions on the value of the smallest dimension of the group.
-
Optionally, select Align cumulated dimension values to align all the values of a group of cumulated dimensions with respect to its orientation reference.
Note: The values are aligned only if their orientation reference is the dimension line. You can define this parameter through Tools > Standards > Drafting > [StandardName] > Dimensions > Cumulate Dimension: Value Orientation Reference. Refer to Dimension Parameters for more information.
Alternatively, you can edit the dimension system properties to change the dimension values alignment. (Applicable for Post-R14 dimensions only). Refer to Editing Dimension Properties for more information.
-
Make sure the Only organize into systems option is not selected.
-
Click OK to validate.
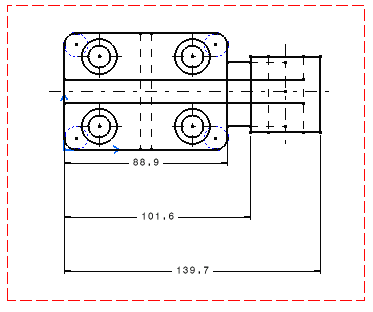
The smallest dimension is positioned with an offset of 20 mm according to the selected element. The offset between each dimension is equal to 30mm.

Specific information about the Line-up command
![]()