-
Under Display, click Columns...
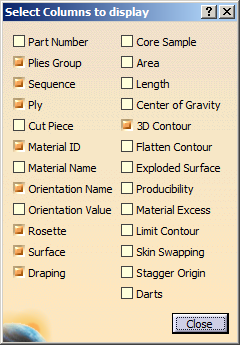
The Select Columns to display dialog box opens.
-
Select the check boxes corresponding to the columns to display.
The columns are added to the 2D Viewer.
The selection of columns to display is kept when you exit the Stacking Management by OK.
Some specific behavior are listed below. -
A first check is done on contours when Stacking Management is started. If the status is unknown, the 3D contour is marked ?.
Complete this first check with a complete one (more time consuming).- Select 3D Contour.
3D Contours Full Check in the main dialog box becomes available. - Click 3D Contours Full Check.
The status of the checked 3D contours (OK or Failed) is displayed in the 3D Contour column. - Place the cursor over the status to retrieve the details of the failure.
- Select 3D Contour.
-
- If the Entity Level is set to Cut-pieces, OK indicates that the cut-piece has a flatten contour.
- If the Entity Level is set to Plies Group, Sequence or Ply, the column indicates the ratio of cut-pieces that have a flatten contour.
-
- If the Entity Level is set to Cut-piece, OK indicates that the cut-piece has an exploded surface.
- If the Entity Level is set to Ply, OK indicates all the cut-pieces have an exploded surface. Otherwise, the ratio of cut-pieces that have an exploded surface is given.
-
The status is always given with respect to cut-pieces. -
If the Entity Level is set to Cut-pieces,
OK indicates that the cut-piece has a
producibility.
- If the ply has no cut-piece, and has a producibility, the status is OK.
- If the ply has one cut-pieces, and the cut-piece has a producibility, the status is OK.
- If the ply has a cut-piece that does not have a producibility, the status is left blank (not OK), even if the ply itself has a producibility.
- If the Entity Level is set to Plies
Group, Sequence or Ply:
- If the ply has no cut-piece, and has a producibility, the status is OK.
- If the ply has cut-pieces, the column indicates the ratio of cut-pieces that have a producibility.
-
If the Entity Level is set to Cut-pieces,
OK indicates that the cut-piece has a
producibility.
-
- If the Entity Level is set to Ply, Y indicates the ply has a limit contour. Otherwise it is left blank.
- If the Entity Level is set to Plies Group, and if the plies group has no cut-piece, the column indicates the ratio of plies that have a limit contour.
-
- If the Entity Level is set to Cut-piece, a number indicates the cut-piece has darts.
- If the Entity Level is set to Plies Group, Sequence or Ply, the column indicates the ratio of cut-pieces that have a dart.
-
- If the Entity Level is set to Ply, the column gives the name of the stagger origin point, if any. Otherwise, it is left to blank.
- If the Entity Level is set to Plies Group, the column indicates the ratio of plies that have a stagger origin point.
![]()