You can perform these operations within the Constraints node:
- You can move all types of constraints. What is more, the application does not take their status into account: if they are deactivated or even broken, you can relocate them.
- Whatever operation you perform for modifying their locations in the tree, it never affects the geometry of your assembly.
- You cannot create a set of constraints in a flexible assembly. If you make a rigid sub-assembly as flexible, set of constraints are removed.
Reordering Constraints
-
Select the constraint to be moved and right-click the Constraint.x object> Reorder constraints contextual command.
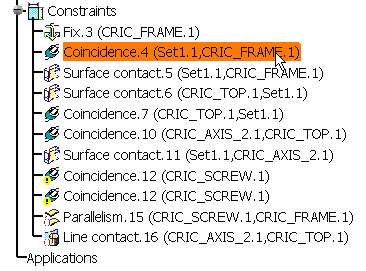
-
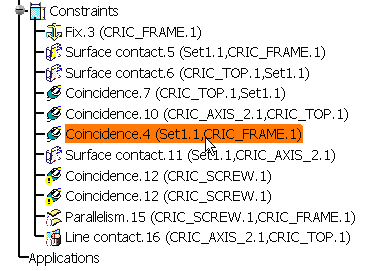
Select another constraint below which the first constraint is to be located.
The first constraint has been moved.
Gathering Constraints in a Set
The application has created Set.1 containing both surface constraints.
-
Select Set.1 and right-click to use the Properties contextual command.
-
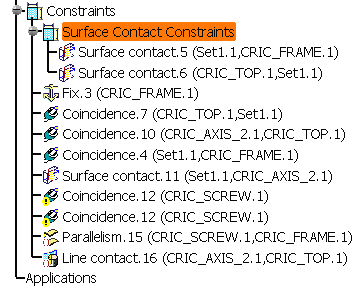
In the Properties dialog box that appears, rename Set.1 as Surface Contact Constraints in the Feature Name field of the Feature Properties tab.
-
Expand this node.
You must obtain this:
Creating a Set Before Gathering Constraints
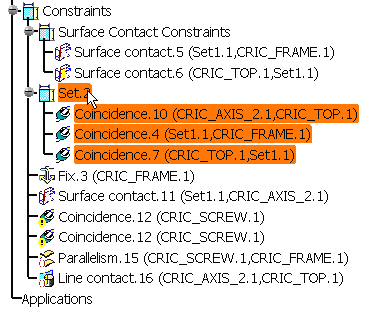
A new set, Set.2, appears in the tree, at the same level as 'Surface Contact Constraints' set. It has been created at the first level of the Constraints node.
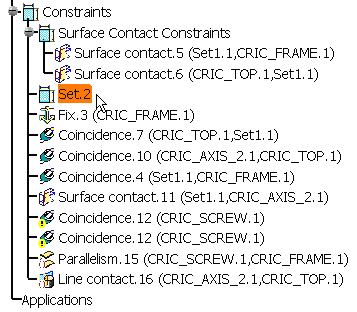
-
Multi-select three constraints and right-click to use the Selected objects > Reorder constraints contextual commands.
-
Select Set.2 as the new location for these constraints.
-
Expand the new node to check that Set.2 contains the three constraints:
Handling Sets
-
Right-click Set.2 and select Set.2 object to display the contextual menu available for this node.
The following contextual commands are available: