This functionality is available for any application-supported hardware providing the necessary buttons, e.g. SpacePilot, SpacePilot PRO, Space Mouse and the Spaceball range of 3D input devices, joysticks, Intersense wand, etc.
-
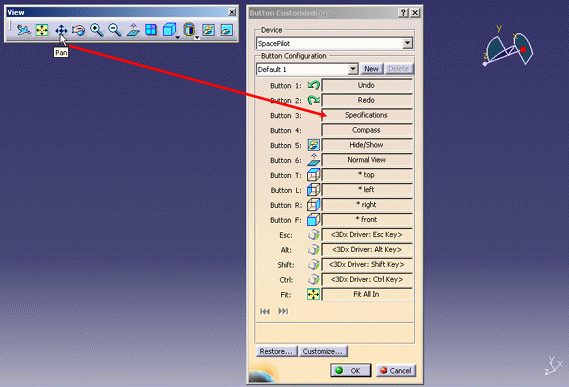
Select View > Toolbars > 3DxDevice to display the 3DxDevice toolbar.
-
In the 3DxDevice toolbar, click Opens the Button Customization dialog box
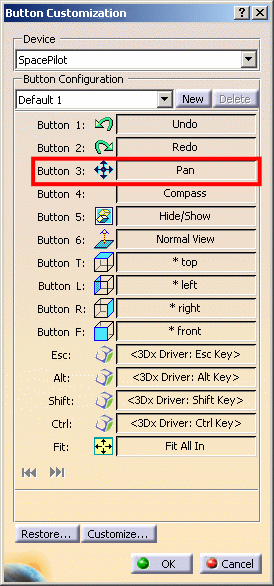
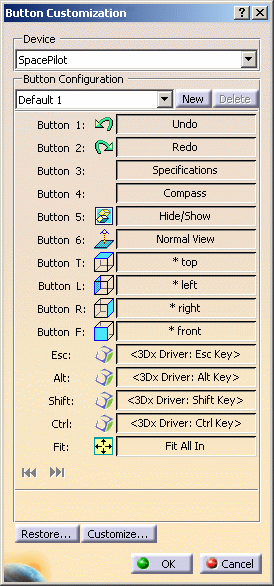
 to open the Button Customization dialog box:
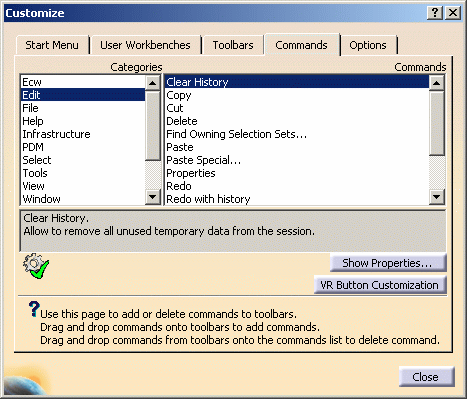
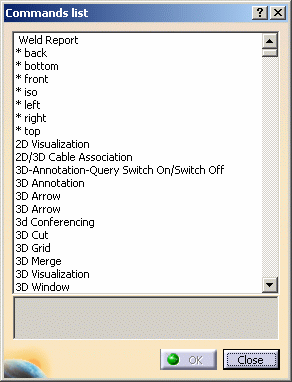
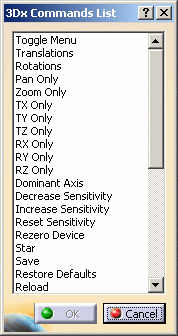
You can also access the Button Customization dialog box using one of the methods below: - Select Tools > Customize, choose the Commands tab then select VR Button Customization
- Select View > Commands List then select VR Button Customization
- Type
c:VR Button Customizeorc:3Dx Button Customizein the power input field then press Enter - Press button "1" of your Space Mouse or Spaceball (if you are using original settings).
This scenario uses the SpacePilot as an example but do not forget that the buttons displayed in the Button Customization dialog box depend on the device you are using. For instance, when using the SpaceMouse, the look of the dialog box is as follows: 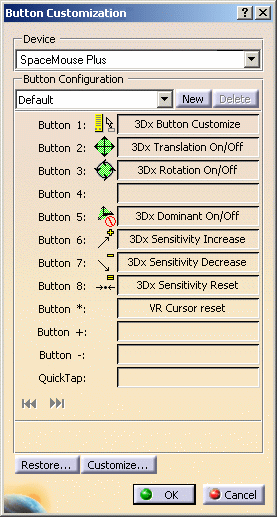
Let's have a look at the information displayed in this dialog box: 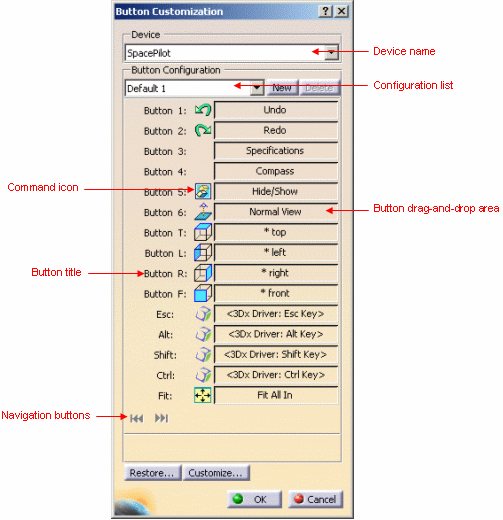
- The Device list displays the name of the device you are using.
- The Button Configuration list displays the default configurations available as well as the configurations you created.
- The command icon displays the mapped command icon (if available) as it is shown on a toolbar.
- The button drag-and-drop area displays the title of the command or macro which is currently assigned to the corresponding device button. For instance, the Redo command has been assigned to "Button 2".
- The button title displays the device button title. For instance, with a SpaceBall 4000FLX the tenth button from the top is shown as "Button A".
- The navigation buttons are not grayed out to let you skip
backward
 and forward
 through the pages if the device you have chosen has more than 15
buttons, which is the case for the SpacePilotPRO for instance.
In addition to that: - Pointing at a command name displays the tooltip of the corresponding mapped command:

- Pressing a device button displays a red arrow to the left of the corresponding button name in the Button Customization dialog box:

When starting a Version 5 session with no settings defined, two default mappings are provided in the two default configurations shown below, provided that you use the new device and you installed the new driver (minimum level required: 5.0.7): Default configuration 1 Default Configuration 2 
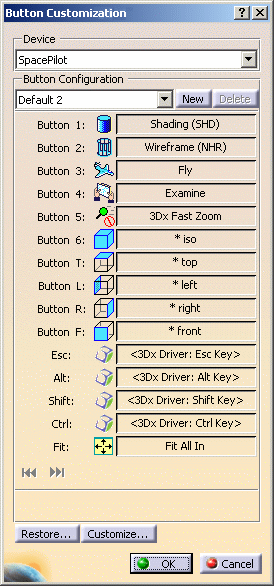
Note that this mapping differs from the one of the SpaceMouse. In that case, only the former default configuration is available and this, whatever the driver version (anterior to 5.0.7 or later) you installed.
Similarly, if you use the SpacePilot with a driver anterior to 5.0.7, only the former default configuration is available:
-
In the Device area, use the list to select the device to be used. In our example, the device is a SpacePilot.
-
In the Button Configuration area, select the default configuration to be used:
-
If you are using the SpacePilot and the new driver, you can choose between Default 1 and Default 2 as explained above
-
If you are using a SpaceMouse, only one default configuration is available (whatever the driver).
-
-
To create a new button configuration, click New:
-
With the SpacePilot and the new driver, the configuration is initialized with Default 1
-
With a SpaceMouse, the configuration is initialized with the default configuration.
Each configuration you create is named "Configurationn", "n" is incremented by "1" for each new configuration.
Whene several configurations have been created, you can switch from one configuration to another using the list.
-
-
If you want to delete one of the configurations you created, select it from the list then click Delete.
Note that default configurations cannot be deleted.
-
You can also rename the configurations (either default or new) displayed in the list. To do so, right-click the configuration to be renamed from the list then select Rename. This opens the Rename Configuration dialog box:

In the New title box, enter the new configuration name then click OK to validate. The new name is then displayed in the Button Configuration list: 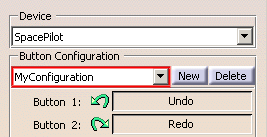
-
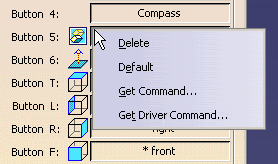
Map the desired device button to a particular command or macro using one of the four methods detailed below:
-
Repeat step 8 as many times as needed to map your device buttons.
-
Click OK to validate your mapping and close the Button Customization dialog box.
The mapping you defined is saved in Version 5 settings, more precisely in a file named VRButtonCustomize.CATSettings. -
Press the desired device button to activate the command you assigned to it. Note that if the Button Customization dialog box is still open, pressing a device button has no effect.
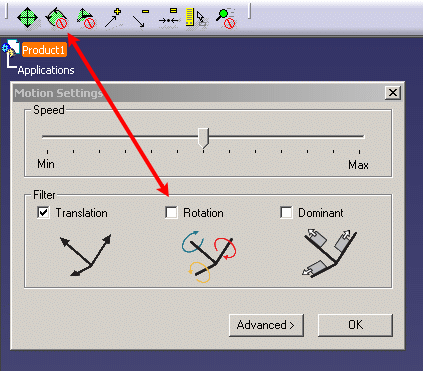
From V5R15 onwards, the calibration state is shared by your Version 5 session and the device driver. Therefore, any change made in V5 (for instance, disabling the rotation) is automatically made in the button function of the device driver and reciprocally: -
Access the 3Dxconnexion Control Panel then click the Motion Settings button to open the Motion Settings dialog box (click the thumbnail to see the full-size picture):

-
Access your Version 5 session so that it is displayed in background then, in the Motion Settings dialog box, clear the Rotation check box: Rotation is instantaneously disabled in Version 5:
-
In the Motion Settings dialog box, click OK to validate your modification and close the dialog box.
Note that this applies only to calibration items that can be modified, i.e. Sensitivity, Dominant Mode, Translation On/Off and Rotation On/Off. The calibration state is saved in the driver settings. The default calibration calibration can be restored by entering the following command: c:3Dx Sensitivity Reset -
To restore the button mappings, click Restore... to open the following dialog box:
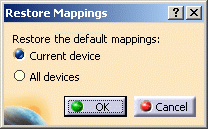
Two options are available: - Current device lets you restore the original button mapping for the device you are currently using
- All devices lets you restore the button mapping for all devices to their original commands.
In both cases, if the button mappings have no original settings but only mapped commands or macros, the button drag-and-drop areas will be emptied since mapped commands or macros are not considered as original settings.
-
Select the appropriate option then click OK to validate.
![]()

